Supported log levels are info, debug, warn and error.
const{ Logger }=require('./index');letlogger=Logger.getLogger(__filename);constprintLogs=args=>{logger.info(`The message to print ${args.subargs}`);}
2020-08-31T09:45:53.717Z [APP_NAME] [INFO] [filename.js] The sample info message.
2020-08-31T09:45:53.720Z [APP_NAME] [DEBUG] [filename.js] The sample debug message. The arguments are {"key1":"value1","key2":"value2"}.
2020-08-31T09:45:53.721Z [APP_NAME] [WARN] [filename.js] The sample warn message.
2020-08-31T09:45:53.722Z [APP_NAME] [ERROR] [filename.js] Error: Sample Error Message with arguments {"key1":"value1"}
    at getTerminatedEmployees (/motifer/examples/service.js:10:20)
    at Object.<anonymous> (motifer/examples/service.js:23:1)
    at Module._compile (internal/modules/cjs/loader.js:778:30)
    at Object.Module._extensions..js (internal/modules/cjs/loader.js:789:10)
    at Module.load (internal/modules/cjs/loader.js:653:32)
    at tryModuleLoad (internal/modules/cjs/loader.js:593:12)
    at Function.Module._load (internal/modules/cjs/loader.js:585:3)
    at Function.Module.runMain (internal/modules/cjs/loader.js:831:12)
    at startup (internal/bootstrap/node.js:283:19)
    at bootstrapNodeJSCore (internal/bootstrap/node.js:623:3)
2020-08-31T09:45:53.723Z [APP_NAME] [ERROR] [filename.js] Error: Sample Error Message
    at getTerminatedEmployees (/motifer/examples/service.js:10:20)
    at Object.<anonymous> (motifer/examples/service.js:23:1)
    at Module._compile (internal/modules/cjs/loader.js:778:30)
    at Object.Module._extensions..js (internal/modules/cjs/loader.js:789:10)
    at Module.load (internal/modules/cjs/loader.js:653:32)
    at tryModuleLoad (internal/modules/cjs/loader.js:593:12)
    at Function.Module._load (internal/modules/cjs/loader.js:585:3)
    at Function.Module.runMain (internal/modules/cjs/loader.js:831:12)
    at startup (internal/bootstrap/node.js:283:19)
    at bootstrapNodeJSCore (internal/bootstrap/node.js:623:3)
ExpressLoggerFactory
Initialize the ExpressLoggerFactory object once with express server object and use it in different routes. Make sure you initialize the body parser middleware before motifer initialization to log the request body.
index.js / app.js
constexpress=require("express");constbodyParser=require("body-parser");const{ ExpressLoggerFactory }=require("motifer");// Change this Object according to your route.constroute=require("./src/controllers/route");constport=8080;//Configure the serverconstserver=express();//Configure the JSON body parser for request.server.use(bodyParser.json());// Motifer - This is a mandatory initialization to send the express object to // the motifer scope. If this configuration not set, it will not print the requestId.letoptions=[{"rotate": true,"filename": "logfile-%DATE%.log","frequency": "5m","datePattern": "YYYY-MM-DD-HHmm","archived": true,"maxSize": "20m","maxFiles": "14d","dirname": "/home/ankur/motifer/examples","level": "debug"}];constLogger=newExpressLoggerFactory("app","debug",server,options);constlogger=Logger.getLogger(__filename);//Server port configuration.server.listen(port,()=>{logger.info(`Motifer node server is running on port:`,port);});//Register the controllers as routers.server.use("/api",route);
routes.js / service.js / repository.js
constexpress=require("express");const{ Logger }=require("motifer");//ExpressLoggerFactory should be initialized before using this in index.js.constlogger=Logger.getLogger(__filename);//Get router from expressconstrouter=express.Router();//Resourcesrouter.get("/status",async(req,res,next)=>{logger.info("Service status request.");logger.debug("Service is up, sample debug log.",req.query);logger.warn("Warning the parameter is null, sample warn log.");logger.error("Exception is thrown, sample error log.");returnres.json({message: "Service is running!!"});});module.exports=router;
2020-09-13T15:39:26.320Z [request] [47de6d41-6dbd-44fc-9732-e28823755b58] [APP_NAME] [INFO] [GET] [::1] [/api/status/10?service=myservice&cc=IND] [{}]
2020-09-13T15:39:26.325Z [service] [47de6d41-6dbd-44fc-9732-e28823755b58] [APP_NAME] [INFO] [status.js] Some sample messages to print.
2020-09-13T15:39:26.325Z [service] [47de6d41-6dbd-44fc-9732-e28823755b58] [APP_NAME] [DEBUG] [status.service.js] Publishing data to channel with topic: sampleTopic.
2020-09-13T15:39:26.326Z [service] [47de6d41-6dbd-44fc-9732-e28823755b58] [APP_NAME] [ERROR] [status.service.js] Error: Runtime Exception
    at exports.checkStatus (/motifer/rest/src/services/status.service.js:8:18)
    at router.get (/motifer/rest/src/controllers/status.js:15:5)
    at Layer.handle [as handle_request] (/motifer/rest/node_modules/express/lib/router/layer.js:95:5)
    at next (/motifer/rest/node_modules/express/lib/router/route.js:137:13)
    at Route.dispatch (/motifer/rest/node_modules/express/lib/router/route.js:112:3)
    at Layer.handle [as handle_request] (/motifer/rest/node_modules/express/lib/router/layer.js:95:5)
    at /motifer/rest/node_modules/express/lib/router/index.js:281:22
    at param (/motifer/rest/node_modules/express/lib/router/index.js:354:14)
    at param (/motifer/rest/node_modules/express/lib/router/index.js:365:14)
    at Function.process_params (/motifer/rest/node_modules/express/lib/router/index.js:410:3)
2020-09-13T15:39:26.326Z [service] [47de6d41-6dbd-44fc-9732-e28823755b58] [APP_NAME] [WARN] [status.js] Service status request.
2020-09-13T15:39:26.331Z [response] [47de6d41-6dbd-44fc-9732-e28823755b58] [APP_NAME] [INFO] [GET] [::1] [/api/status/10?service=search&cc=IND] [304] [10] [6.018 ms] [Mozilla/5.0 (X11; Linux x86_64) AppleWebKit/537.36 (KHTML, like Gecko) Chrome/85.0.4183.102 Safari/537.36]
2020-09-13T15:39:26.815Z [request] [bcf6d2e2-f8c9-49ee-9efa-65fb15d8b11e] [APP_NAME] [INFO] [GET] [::1] [/favicon.ico] [{}]
2020-09-13T15:39:26.817Z [response] [bcf6d2e2-f8c9-49ee-9efa-65fb15d8b11e] [APP_NAME] [INFO] [GET] [::1] [/favicon.ico] [404] [150] [1.880 ms] [Mozilla/5.0 (X11; Linux x86_64) AppleWebKit/537.36 (KHTML, like Gecko) Chrome/85.0.4183.102 Safari/537.36]
LoggerFactory
The object has three parameter.
Param
Description
Mandatory
Default
Comments
service
Application or service name.
Yes
NA
This is a mandatory param.
level
Log level for the application.
No
info
Info is default log level.
options
Array of objects for file appender and rotation.
No
null
If not supplied file appender will not be attached.
ExpressLoggerFactory
The object has four parameter.
Param
Description
Mandatory
Default
Comments
service
Application or service name.
Yes
NA
This is a mandatory param.
level
Log level for the application.
Yes
NA
This is a mandatory param.
express
Express object
Yes
NA
This is a mandatory param.
options
Array of objects for file appender and rotation.
No
null
If not supplied file appender will not be attached.
Options
You can rotate files by minute, hour, day, month, year or weekday. The object contains following options:
rotate: A boolean to define whether or not to rotate log files. (default: ‘false’)
frequency: A string representing the frequency of rotation. This is useful if you want to have timed rotations, as opposed to rotations that happen at specific moments in time. Valid values are ‘#m’ (minites) or ‘#h’ (hours) (e.g., ‘5m’ or ‘3h’). You also need to mention thedatePattern for the rotation times. (default: null)
datePattern: A string representing the moment.js date format to be used for rotating. The meta characters used in this string will dictate the frequency of the file rotation. For example, if your datePattern is simply ‘HH’ you will end up with 24 log files that are picked up and appended to every day. Make sure to define this along with the frequency for specific pattern rotation. Example patterns for day: ‘YYYY-MM-DD’, hours: ‘YYYY-MM-DD-HH’ and minutes: ‘YYYY-MM-DD-HHmm’. (default: ‘YYYY-MM-DD’)
filename: Filename to be used to log to. This filename can include the %DATE% placeholder which will include the formatted datePattern at that point in the filename. (default: ‘motifer-%DATE%.log’)
dirname: The directory name to save log files to. (default: ‘.’)
maxSize: Maximum size of the file after which it will rotate. This can be a number of bytes, or units of kb, mb, and gb. If using the units, add ‘k’, ‘m’, or ‘g’ as the suffix. The units need to directly follow the number. (default: ’20m’)
maxFiles: Maximum number of logs to keep. If not set, no logs will be removed. This can be a number of files or number of days. If using days, add ‘d’ as the suffix. (default: ’14d’)
archived: A boolean to define whether or not to archived log files. (default: ‘true’)
level: Log level for the file appender. (default: ‘info’)
Examples
Logger without file appenders.
//Initialize the express server.constserver=express();constLogger=newExpressLoggerFactory("app","debug",server);
Logger with file appenders but without file rotation.
//Initialize the express server.constserver=express();letoptions=[{"filename": "logfile.log","dirname": "/home/ankur/motifer/examples"}];constLogger=newExpressLoggerFactory("app","debug",server,options);
OpenMoM is an attempt to rewrite from scratch a port of Master Of Magic game from Microprose.
The aim of the project is accuracy and extensibility: everything should be as much similar to the original game but at the same time the design should allow to easily tweak or extend the mechanics of the game itself.
How is it written?
The engine is written in C++14 and SDL2.0 is used for graphics, window management and controls.
The graphics engine is written to ease the management of the low level profile graphics of the original game. Everything is palette based and drawing is made by using an approach which probably resembles the one used originally for the game. While this implies that everything is quite low level, this really helps in mimicking the original behavior of most effects and animations. This also makes the grapichs quite abstract from the effective graphics framework as long as it is able to draw a texture.
Philosophy
While it might seems quite obsessive the first and more important thing is being similar to the original game in the first place. Every animation, font, colors, placement, should be as similar as possible to the original game. This doesn’t mean that the game itself shouldn’t be enhanced but that it should be possible to play it also as if it were the original game.
The implementation, though, should be extensible and well designed, especially regarding game data and behavior of things like spells, combat, AI.
Running
The code compiles on macOS with the provided XCode project, on Windows with the provided VS2017 project and on Debian Linux supposedly (through CMake). You need to copy all the original LBX files from the game into data/lbx to run the game.
The XCode and VS2017 projects also provide a LBX manager target which is used to see all the data inside LBX files and mark it as used.
On Windows you need to put your SDL2 libraries and includes inside libs/sdl2/win folder. Includes should go inside libs/sdl2/win/include while libs should go inside libs/sdl2/win/lib/x64/ (or x86) folder. Don’t forget to put SDL2_Image too which is required to compile.
Current status
Master of Magic is a game of incredible complexity, each single and minor aspect is full of quirks and special considerations that have been made during the original development. Tthis probably means that a lot of spaghetti code was involved in the original game, which makes reproducing the structure while updating the design to something more manageable and extensible quite a challenging task.
Much work have been done on the overall structure of the game, management for units, armies, cities, combat, spells is already present but at a prototype stage. The graphics engine already supports almost all the feature required by the original game, LBX support is almost done and bugless and allows to use original graphics without much effort.
Many attempts of writing a remake of Master of Magic have been made and just a few reached the playable stage, since this is a hobby project done on my free time I’m more focused on the entertainment given by designing a flexible architecture.
Given that anyone willing to contribute is welcome and I can provide any insight on the structure of the engine to get up running.
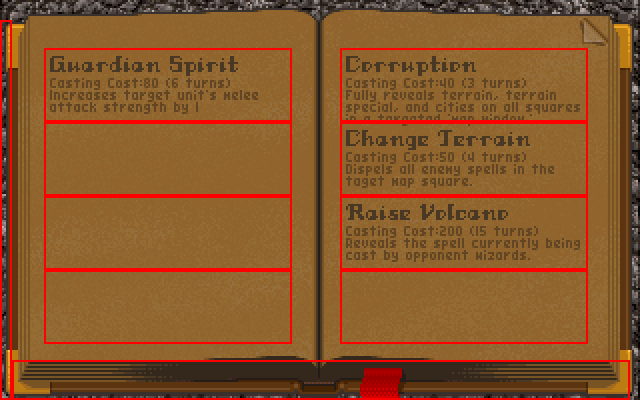
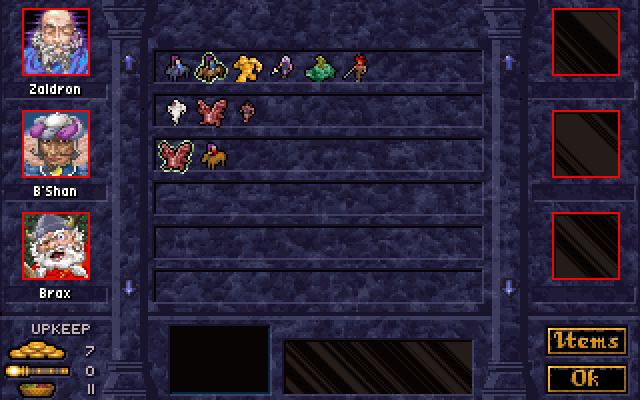
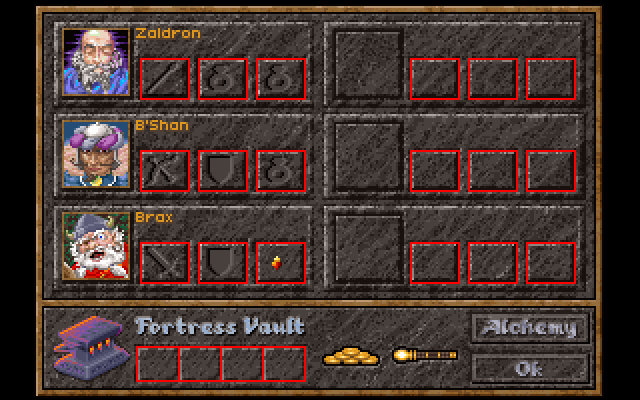
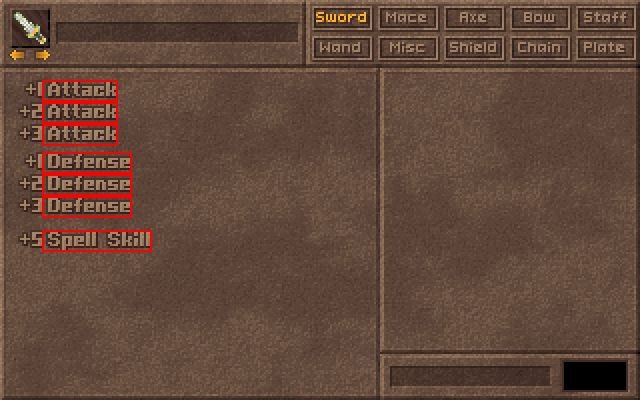
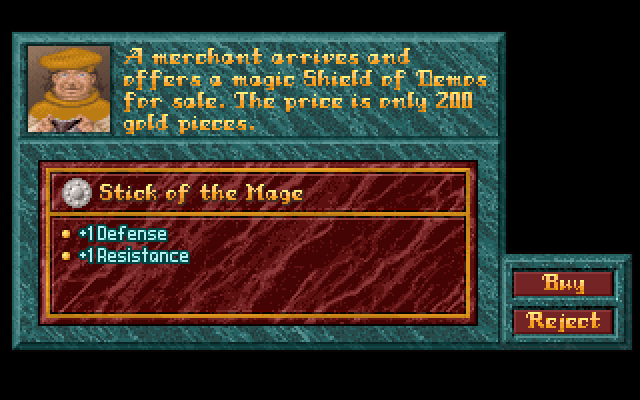
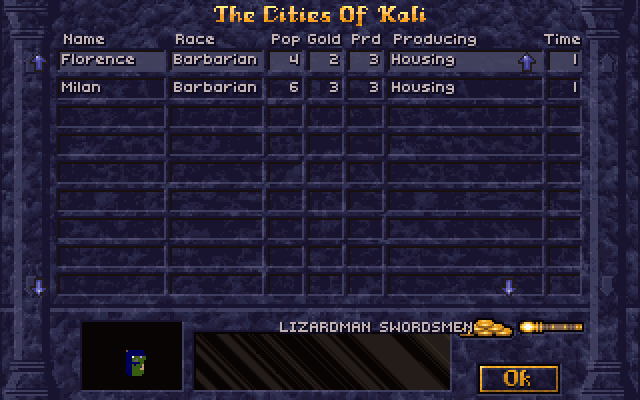
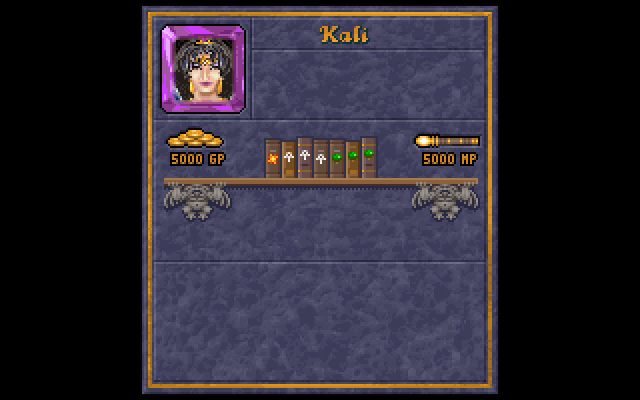
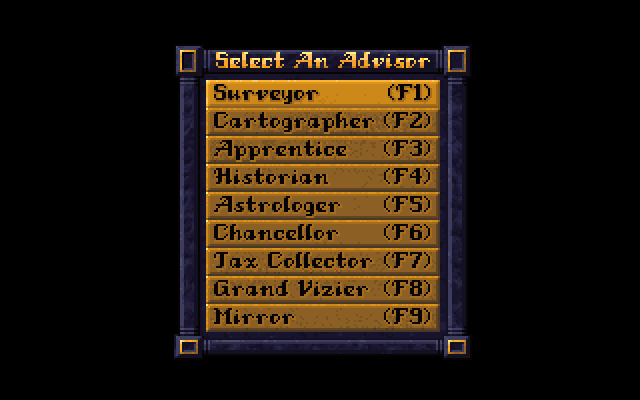
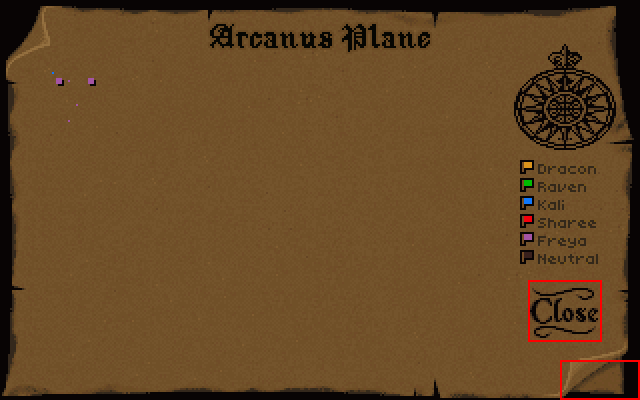
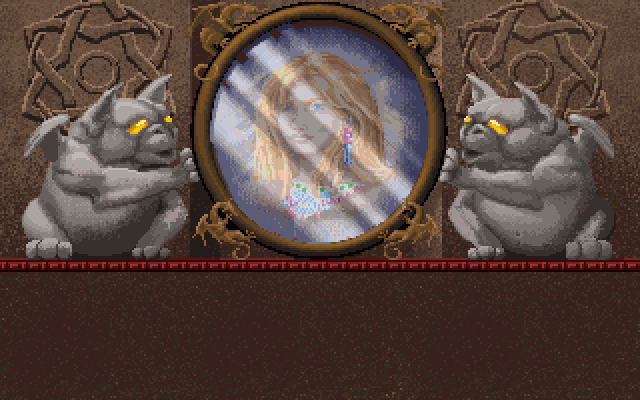
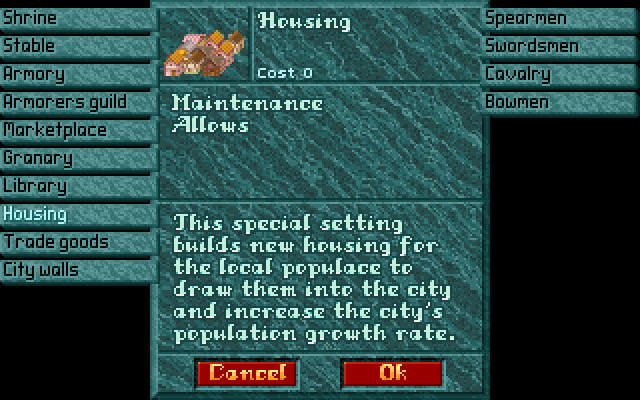
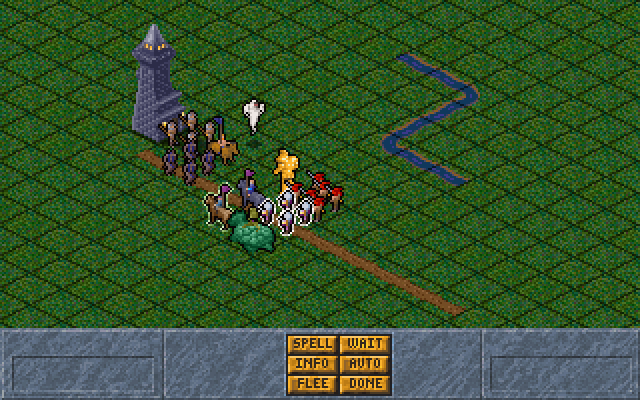
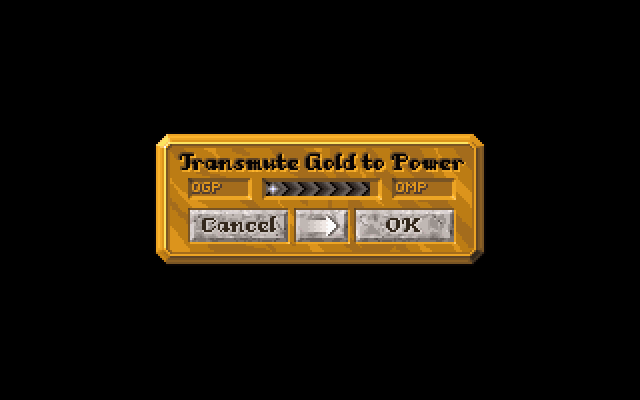
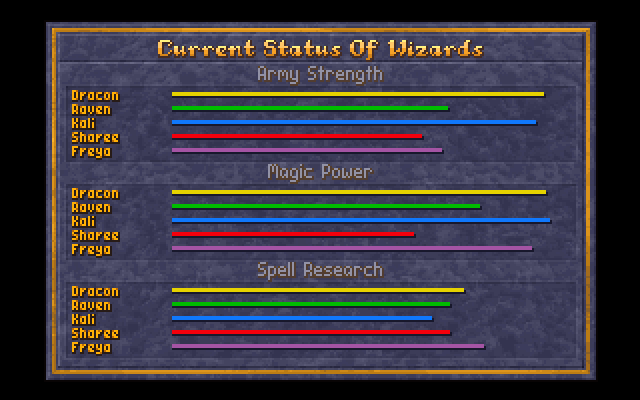
Current screenshots
These screenshots are generated automatically for each view of the game, they don’t respect the realtime status since, for example, intro view requires some timing to actually show something but they’re here to showcase the status:
OpenMoM is an attempt to rewrite from scratch a port of Master Of Magic game from Microprose.
The aim of the project is accuracy and extensibility: everything should be as much similar to the original game but at the same time the design should allow to easily tweak or extend the mechanics of the game itself.
How is it written?
The engine is written in C++14 and SDL2.0 is used for graphics, window management and controls.
The graphics engine is written to ease the management of the low level profile graphics of the original game. Everything is palette based and drawing is made by using an approach which probably resembles the one used originally for the game. While this implies that everything is quite low level, this really helps in mimicking the original behavior of most effects and animations. This also makes the grapichs quite abstract from the effective graphics framework as long as it is able to draw a texture.
Philosophy
While it might seems quite obsessive the first and more important thing is being similar to the original game in the first place. Every animation, font, colors, placement, should be as similar as possible to the original game. This doesn’t mean that the game itself shouldn’t be enhanced but that it should be possible to play it also as if it were the original game.
The implementation, though, should be extensible and well designed, especially regarding game data and behavior of things like spells, combat, AI.
Running
The code compiles on macOS with the provided XCode project, on Windows with the provided VS2017 project and on Debian Linux supposedly (through CMake). You need to copy all the original LBX files from the game into data/lbx to run the game.
The XCode and VS2017 projects also provide a LBX manager target which is used to see all the data inside LBX files and mark it as used.
On Windows you need to put your SDL2 libraries and includes inside libs/sdl2/win folder. Includes should go inside libs/sdl2/win/include while libs should go inside libs/sdl2/win/lib/x64/ (or x86) folder. Don’t forget to put SDL2_Image too which is required to compile.
Current status
Master of Magic is a game of incredible complexity, each single and minor aspect is full of quirks and special considerations that have been made during the original development. Tthis probably means that a lot of spaghetti code was involved in the original game, which makes reproducing the structure while updating the design to something more manageable and extensible quite a challenging task.
Much work have been done on the overall structure of the game, management for units, armies, cities, combat, spells is already present but at a prototype stage. The graphics engine already supports almost all the feature required by the original game, LBX support is almost done and bugless and allows to use original graphics without much effort.
Many attempts of writing a remake of Master of Magic have been made and just a few reached the playable stage, since this is a hobby project done on my free time I’m more focused on the entertainment given by designing a flexible architecture.
Given that anyone willing to contribute is welcome and I can provide any insight on the structure of the engine to get up running.
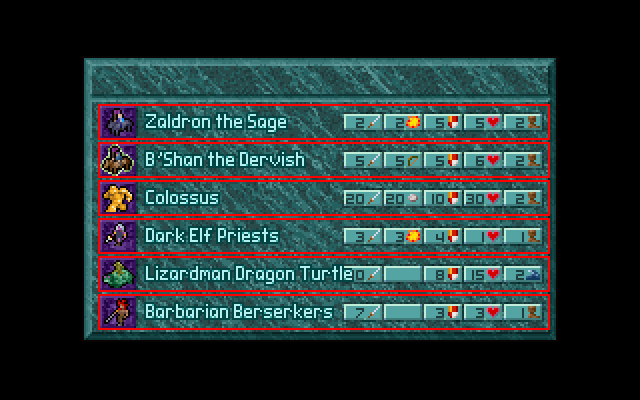
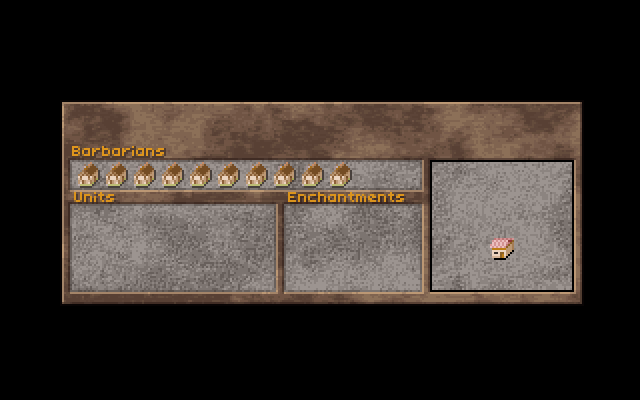
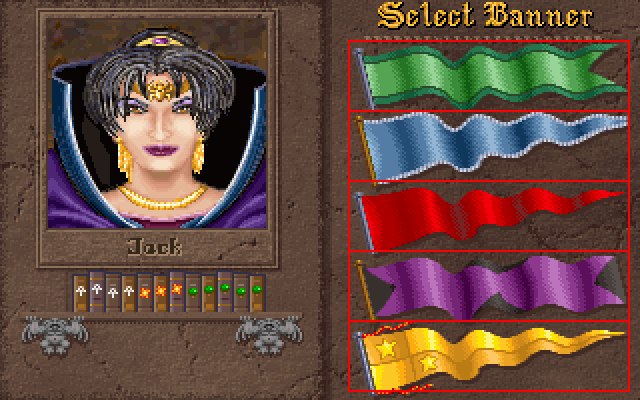
Current screenshots
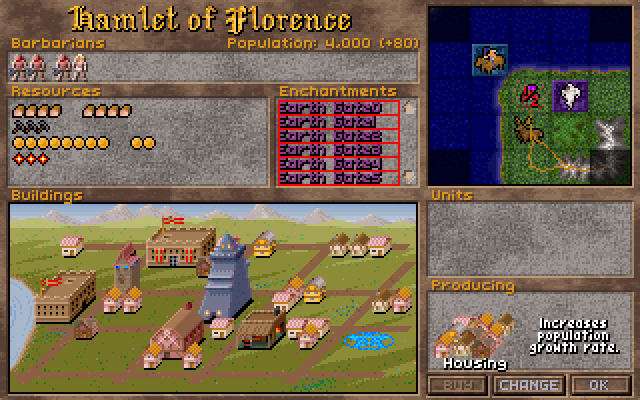
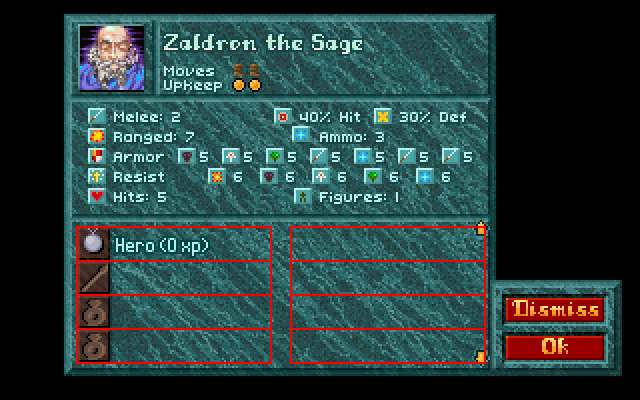
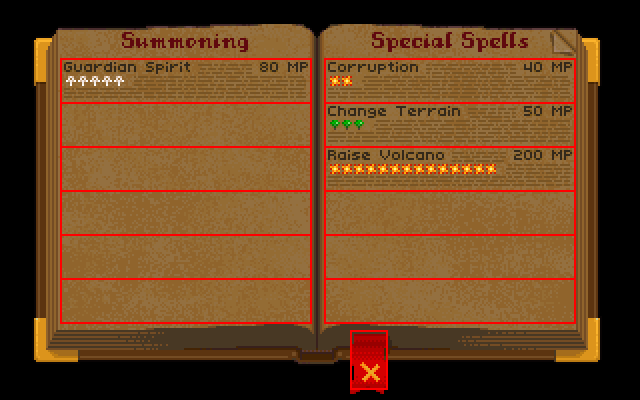
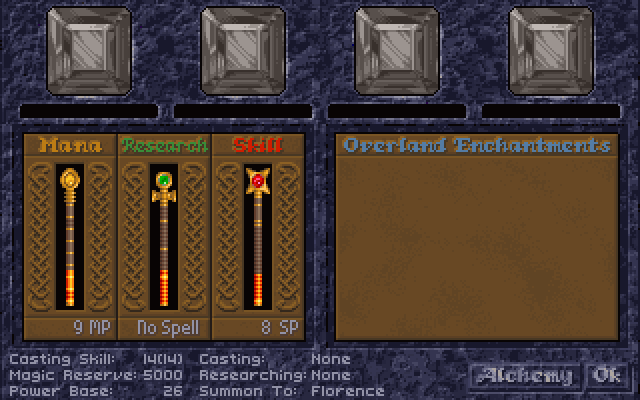
These screenshots are generated automatically for each view of the game, they don’t respect the realtime status since, for example, intro view requires some timing to actually show something but they’re here to showcase the status:
This is a list of 2 lists of the languages currently used for this project:
Human spoken languages
Currently, this project is written in only 1 human spoken language, with no translations. This includes:
English (US)
No other human spoken languages are in use for this project.
Computer languages
This project is written in 4 different computer languages, that include:
HTML5
CSS3
Markdown
Plain Text
No other languages
That is the list of languages used on this project
Editions
This is a list of 2 lists of the editions of this website:
Google sites edition
The Google sites edition is the current live edition of the site, but it is incomplete. I am still trying to figure out how to get a digital copy of it.
The HTML5 edition is the version I created from scratch, so that I could have more functional, and control… and a digital copy.
Both versions have been developed near the same amount, this version isn’t complete as well.
Pet streaming
Pet streaming is a feature I am trying to figure out how to add, it is an extra option where pets kept in the stall can be live streamed to the website, so that you can check on them while you are away, and after your visit ends, you can choose to download the videos of the stream.
This feature is not very developed at the moment, and does not work.
GitHub issues
This is a list of the current GitHub issues for this project:
This program generates a perfect maze (a maze each point has exactly one path to it).
As an added bonus, a gif is generated showing the process that was taken to generate the maze. The red dot at the end of the gif is the goal point of the maze. It is the farthest point from the start.
For fun, here is a 61 by 61 maze
Running the Program
This program was made for python 3.10 or later.
usage: maze_pretty.py [-h] [-d DIM] [-y Y_DIM] [-p] [-o OUTPUT] [-n]

Generates a perfect maze

options:
  -h, --help            show this help message and exit
  -d DIM, --dim DIM     The maze generated will be of size DIM by DIM (both should be odd)
  -y Y_DIM, --y_dim Y_DIM
                        Overrides the y dimension with this value
  -p, --print           Print every step of the generation to the console
  -o OUTPUT, --output OUTPUT
                        File name for the final gif
  -n, --noGif           Should the gif be left out? (The final result will only be printed to the console)
Seeing as the gif generated can be quite large, if you are on Linux and have gifsicle installed, you can use this command to optimize the gif:
The NYC-TLC-AIRFLOW-ETL repository is a comprehensive solution built with Apache Airflow DAG Running in Docker to extract High-Volume For-Hire Services parquet files from the year 2022, provided by the New York City Taxi and Limousine Commission (TLC), stored in an AWS bucket. The pipeline performs data transformation operations to cleanse and enrich the data before loading it into a Google BigQuery table. The purpose of this ETL pipeline is to prepare the data for consumption by a Looker Studio report, enabling detailed analysis and visualization of the trips by Uber and Lyft.
The DAG is manually triggered or via the API. However, we can easily modify the workflow to run on a defined schedule, like running after the AWS bucket gets the latest High Volume FHV trip parquet file.
Features
Extraction of High-Volume FHV parquet files from the year 2022.
Data transformation and cleansing operations.
Loading of the transformed data into a Google BigQuery table.
Manual triggering of the DAG or API-based triggering.
Configurable scheduling to run the pipeline after the AWS bucket receives the latest High Volume FHV trip parquet file.
Prerequisites
Docker installed on your local machine.
Google BigQuery project and credentials.
AWS S3 bucket credentials.
Setup
Configure the AWS S3 bucket connection
In order to access the High-Volume FHV parquet files stored in the AWS S3 bucket, you need to configure the AWS S3 bucket connection in Apache Airflow. Follow the steps below:
Open the Airflow web interface.
Go to Admin > Connections.
Click on Create to create a new connection.
Set the Conn Id field to s3_conn.
Set the Connection Type to Amazon Web Services.
Fill in the AWS Access Key ID.
Fill in the AWS Secret Access Key.
To load the transformed data into a Google BigQuery table, you must to place the GOOGLE_APPLICATION_CREDENTIALS .json file in the “dags/” folder.
The ETL pipeline requires an Airflow variable called HV_FHV_TABLE_ID, which is the ID of the BigQuery table where the transformed data will be loaded. Follow the steps below to set the variable:
Open the Airflow web interface.
Go to Admin > Variables.
Click on Create to create a new variable.
Set the Key field to HV_FHV_TABLE_ID.
Fill in the Value field with the ID of your BigQuery table.
😁 Open-minded – To take on different types of responsibility and open to adapt
💡 Innovative – Think out-of-the-box and do stuff in a new way or with new technology
🛠 Versatile – I’m very comfortable in different technical or non-technical, roles or duties
😎 Who am I?
Hong Kong born developer specialized in mobile app development turned into experienced manager and team leader of software engineering and technology team.
💻 What do I develop?
Professionally started off as a Symbian developer, I’ve also spent 2 professional years in webapp development with actionscript 3 and PC desktop program/IE plugin in C#/C++. I’m very experienced in mobile app / SDK development and architecture design. Worked in various types of mobile app: data backup, utility, social media, audio processing, device companion app. I have a hand in about 10 apps in Apple App Store.
🖥 What am I doing in my career right now?
I’m currently employed by Tymphany, a world-class audio product manufacturer, and based in Shenzhen at the moment. So I have been working with a lot of different OEM audio branding companies and also technology providers like Google, Amazon, Qualcomm, Tencent, Baidu, etc., for years. Unfortunately lesser hands-on lately, I focus on technology strategy, roadmap planning, and SW IP commercialization in my job right now. I come to Github mostly to check out my teams’ progress, doing code review, and merging pull requests.
🎸 What do I do in leisure time?
I don’t play bass guitar as much as I was but this is still my passion. If I’m not at home or office, I’m most likely traveling in Japan for pleasure or Taipei for business. I love reading and writing about the history of Japan, travel, and also rock music. At the moment, I’m learning software business by doing. DSP or AI might be next. By the way, I’m also diving into the world of whisky tasting.
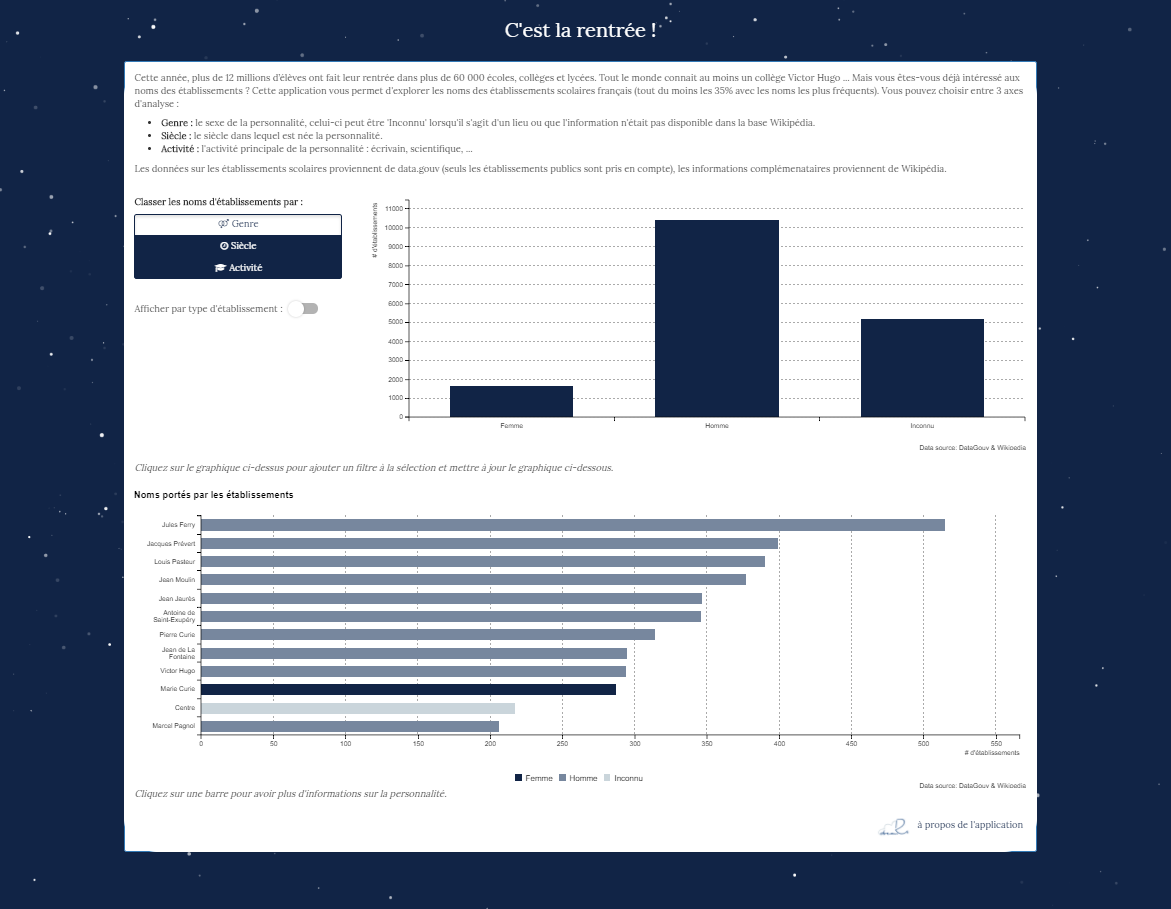
An application to explore the name of public schools in France. The names are represented by the gender, activity, and century of the personality by which establishments were named. More frequent names can be visualized, and you can access to the biography of a personality. All application is in French.
Packages : The application use the following packages : shiny, shinyWidgets, billboarder. To see which versions of these packages are used (and dependancies), look at the file session_info.txt in app directory. If packages are not installed, they will be on application launch.
Data sources : Names of shcools are from data.gouv, data about personality are from Wikipedia and DBpedia.
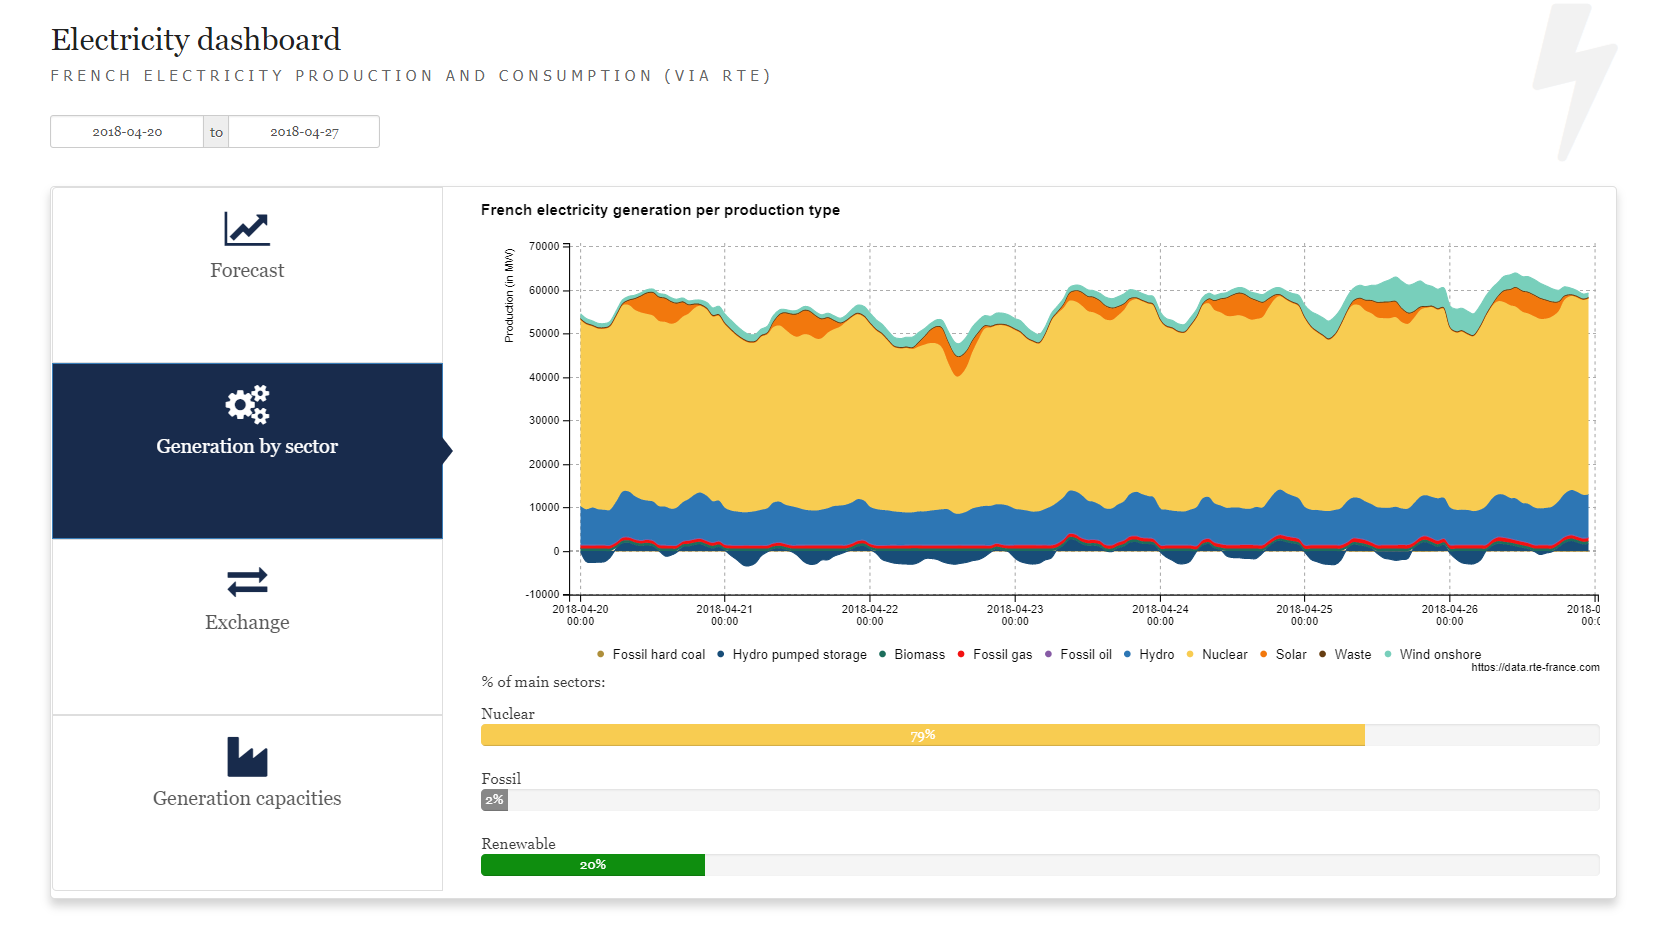
Explore power consumption, production and exchanges in France via RTE’s API.
Packages : The application use the following packages : shiny, shinyWidgets, billboarder, leaflet, rte.data. To see which versions of these packages are used (and dependancies), look at the file session_info.txt in app directory.
Data sources : The data is recovered via the RTE API, a key is required to recover the data but backup data is included in the application to be able to launch it without having access to the API.
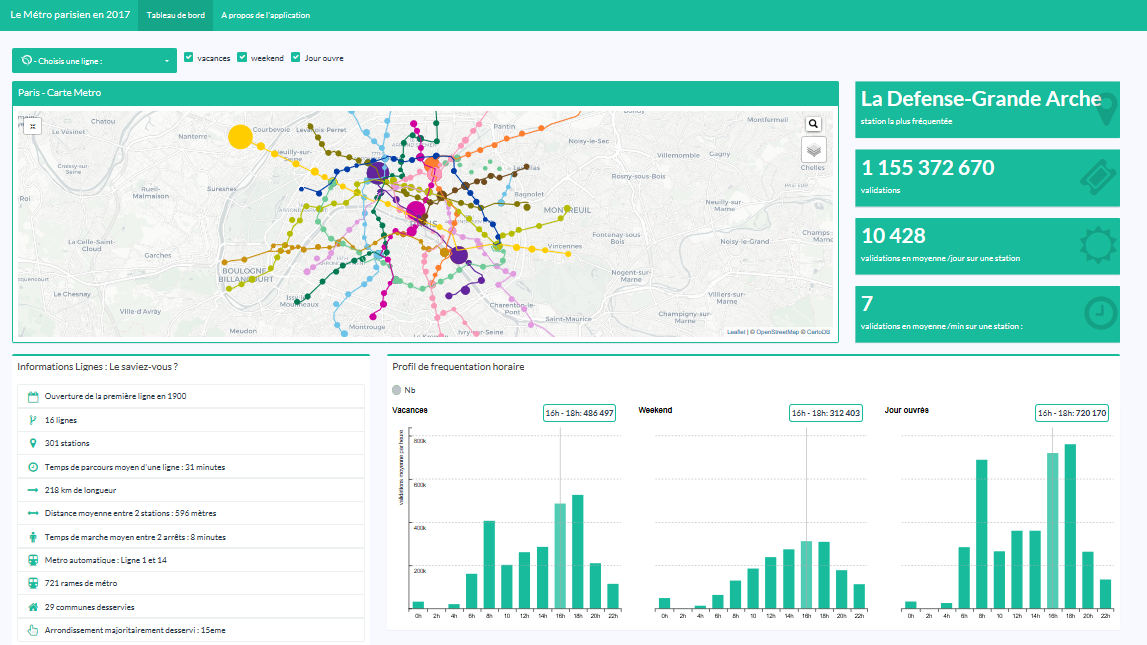
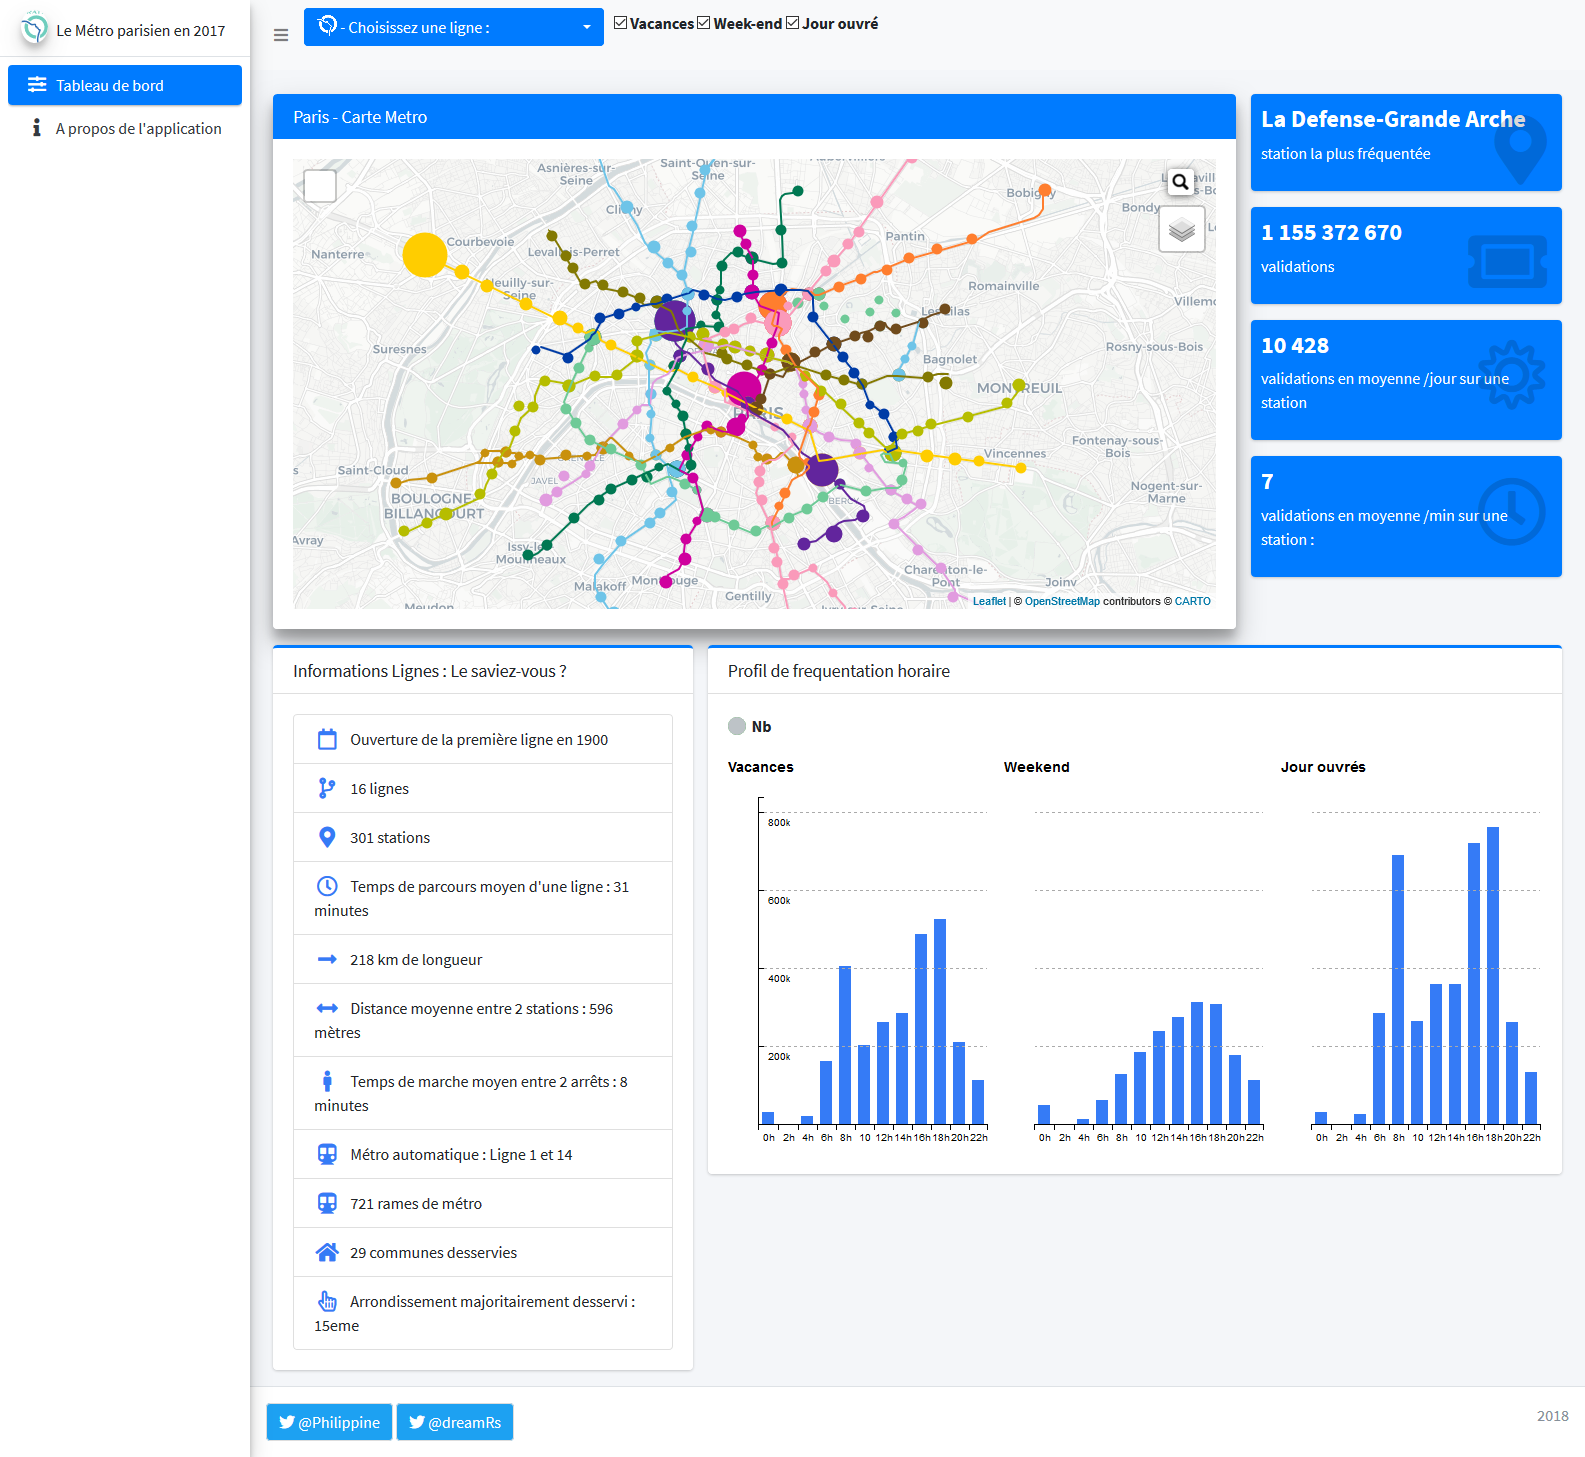
Explore Paris metro traffic ; how it can vary according to the type of day or according to the line or the station.
Also, discover the different characteristics of each line.
Packages : The application use the following packages :
shiny, shinyWidgets,
shinythemes, shinydashboard,
dplyr,
leaflet, leaflet.extras,
scales,
billboarder,
stringr
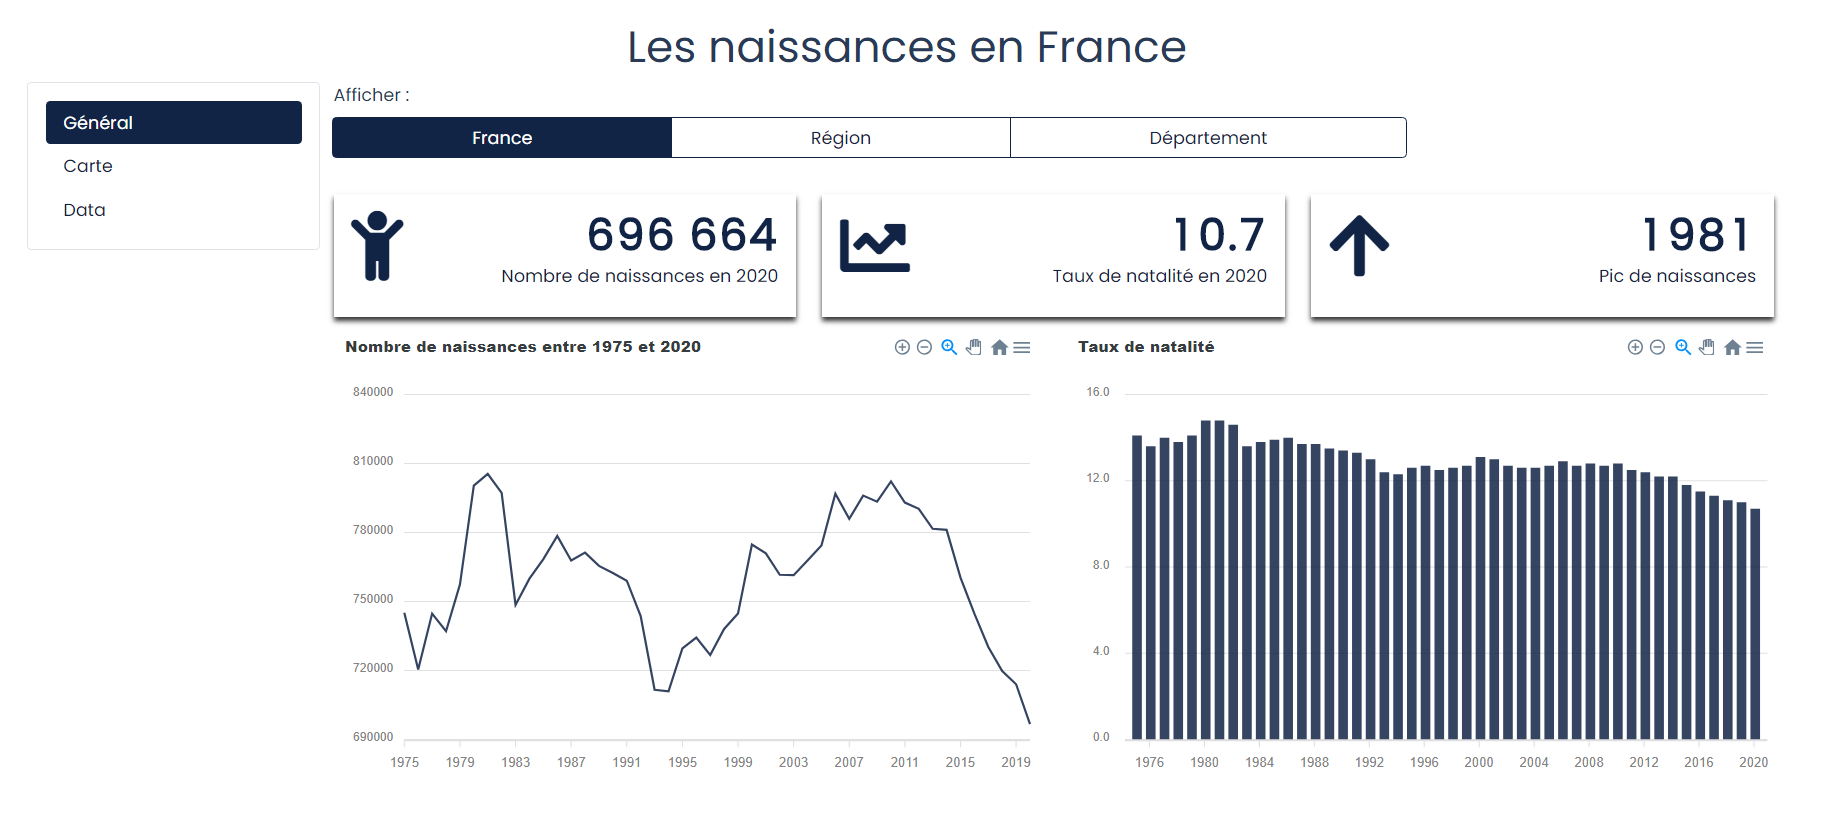
Explore births in France ; how it can vary according to each region or according to each department.
Also, discover the number of births and the birth rate between 1975 and 2020.
Explore the countries that have won the most medals for all the modern summer olympic games, between 1896 and 2020. The medal type (gold, silver, bronze) distribution for each country, slug game edition and discipline.
Stellar is a mod manager for Windows and Linux that supports games including Fallout, Oblivion, Skyrim, and Starfield. Formerly known as Starfield Mod Loader.
Features
Add, re-order, rename, disable and remove your mods and plugins.
Multiple profiles enable quick switching between different games and mod loadouts.
Base profiles allows for easily syncing mods between different devices, or VR and non-VR versions of games.
Root mod support enables management of ENBs, script extenders, and other injectors.
Custom game support allows Stellar to work with many games.
Cross-platform: Native clients for Windows and Linux (including Steam Deck).
Per-profile management of config files, save files, and archive invalidation.
Support for FOMOD installers.
Support for Steam, UWP (Game Pass) and other versions of games.
Note: This guide refers specifically to Starfield in some places, but most of the information also applies to other games.
To enable mods in Starfield, add the following lines to the StarfieldCustom.ini file in your Documents/My Games/Starfield folder if not already present:
To add and manage mods you must first create a profile. Upon first launching the app you will be shown a form to create a new profile.
Select which game you want to create the profile for. Then give your profile a unique name.
Select a Game Installation that the profile will use to deploy to. Any detected game installations will be listed automatically. If no installations are detected, or you want to define your own, select the Custom Installation option and define the required paths.
The Game Root Directory is the game’s installation directory.
The Game Data Directory is the directory mod files are deployed to. This is usually the Data folder inside the Game Root Directory.
The Game Config Files Directory is the directory where the game’s config files are located. For Bethesda games, this is located at <User_Directory>/Documents/My Games/<GameName>.
The Game Saves Directory is the directory where the game’s save files are located. For Bethesda games, this is located at <User_Directory>/Documents/My Games/<GameName>/Saves.
The Game Plugin List Path is the location of the plugins.txt file for the game. For Bethesda games, this is located at <User_Directory>/AppData/Local/<GameName>/plugins.txt.
Steam ID is the Steam ID for the game. This is only applicable if you’re using a Steam version of the game. This is only required if you plan on enabling Steam Compat Symlinks for Linux.
Manage Config/INI files
If the Manage Config/INI Files option is enabled, new config files will be created for the profile. When enabled, you must also define the Game Config Files Directory.
Upon first enabling the option, you will be prompted to copy the existing config files from the Game Config Files Directory to the profile’s config files.
NOTE: When activating mods, the profile’s config files will be copied to the Game Config Files Directory. If any existing config files are in the Game Config Files Directory when mods are activated, they will be moved to a .sml.bak folder during activation. The files moved to .sml.bak will be restored back to their original location upon deactivating mods.
Manage save files
If the Manage Save Files option is enabled, any created save games while this profile is deployed will be tied only to that profile. When enabled, you must also define the Game Saves Directory.
Link mode
When Link Mode is enabled, file links to the mod files will be used instead of copying the files when activating mods. This is significantly faster and uses less disk space. This setting is recommended to be enabled when possible.
Link mode can also be separately enabled for config files and save files. To enable/disable link mode for config or save files, click the icon to the left of Game Config Files Directory or Game Saves Directory.
NOTE: Link mode can only be enabled if the profile is located on the same disk/partition as the game itself.
Archive invalidation
Certain games require a feature called Archive Invalidation to properly load mod files. If this setting is enabled, Stellar will automatically enable archive invalidation to ensure all mods are loaded properly.
NOTE: It is recommended to also enable the “Manage Config/INI Files” option. However if it is disabled, and existing config files can be located, archive invalidation can still be enabled.
Base profile
You can optionally pick a base profile to inherit from. By default only base profiles from the current game are shown, but you can select any base profile by checkng Show all profiles.
See this section for more information about base profiles.
Profile path overrides
You can choose to override any of the profile paths to point to other directories. Each profile path override will be explained below.
Profile Root Path
By default, profiles are stored in the profiles directory where the application is located. Overriding this path will allow you to store the profile at an alternative location. This can be useful if your game is installed on a different drive and you want to co-locate the profile to the same drive as the game to enable Link mode.
A profile with an overridden root path is called an external profile. Existing external profiles can also be added or imported by selecting Profiles -> Add External Profile or Profiles -> Import Profile.
Profile mods path
Overriding this path will allow you to store the profile’s mods at an alternative location.
Profile saves path
Overriding this path will allow you to store the profile’s save files at an alternative location. This is useful if you are syncing save files between multiple PCs or profiles.
Profile config path
Overriding this path will allow you to store the profile’s config files at an alternative location. This is useful if you are syncing config files between multiple PCs or profiles.
Profile backups path
Overriding this path will allow you to store the profile’s backup files at an alternative location.
(Linux) Steam Compat Symlinks
When running a script extender such as SFSE via Steam/Proton, Steam will automatically create a new virtual C drive for it that is different from the virtual C drive used for the game itself. This means that when you go to launch the script extender, your config/INI and save files will not be loaded, and instead new ones will be created on the new virtual C drive.
To avoid having two separate copies of these files, symlinks can be created on the virtual C drive for the script extender that point to the correct directory on the original game’s virtual C drive. This allows both virtual C drives to use the same directory for reading config and save files.
Stellar can automate this behavior by enabling Manage Steam Compat Symlinks for the profile.
You will first need to figure out the new virtual C drive directory for the script extender, which will normally be located in ~/.local/share/Steam/steamapps/compatdata. You will see a number of directories in here with numerical IDs. One of these directories corresponds to the game ID that Steam assigned to the script extender. To determine which game ID is the correct one, you can look at the folder’s “Date modified” timestamp to figure out which virtual drive directories were created recently. Assuming you added the script extender to Steam recently, the directory should have a Date modified field that matches when it was added to Steam.
Once you have found the custom game ID, enter it as the Custom Steam Game ID for the profile. The necessary symlinks will now be created automatically when the profile is deployed.
Profile locking
Profiles can be locked/unlocked by clicking the “Lock Profile” button at the top of the mod list. When a profile is locked you will not be able to change any settings or edit mods for that profile.
Creating additional profiles
You can create additional profiles at any time by pressing the Create Profile button above the Mod List section or by selecting Profile > Add New Profile from the the menu bar.
Add external profiles
External profiles can be added to SML from Profile > Add External Profile. An external profile will remain in the same directory it was added from, allowing for profiles to be used from any location.
Import profiles
Existing profiles can be imported into SML from Profile > Import Profile.
Export profiles
You can export a profile from Profile > Export Profile. Exported profiles will be removed from SML after successful export. A backup of the profile will be written to <OS temp dir>/SML before export.
Delete profiles
You can delete a profile from Profile > Delete Profile. This cannot be undone.
Tip: You can change the app theme at any time under File > Preferences.
Base profiles
Base profiles are a special kind of profile that can be extended by other profiles. Mods and plugins in a base profile are added and managed as normal, but cannot directly be deployed. Instead, other profiles can extend a base profile and will automatically inherit mods, plugins, and config files from the base profile.
This allows for defining a common set of mods that can be used and extended by other profiles. One way this can be useful is for easily deploying a common set of mods between multiple PCs while also allowing for adding mods or config settings that may only be used on certain machines, such as high-res texture packs or specific compatability patches only needed for some devices. This can also be used to sync mods between different versions of games, such as Skyrim SE and Skyrim VR.
Game directories are not defined for base profiles, allowing extending profiles to point to different game installation locations as needed.
Add some mods
Once your profile is set up you can begin adding and managing mods. To add a new mod, click the + icon in the Mod List section and select Add Mod, or select Profile > Mods > Add Mod from the menu bar and choose the mod that you want to install.
Note: You can also import existing mods by clicking the + icon in the Mod List section and select Import Mod, or select Profile > Mods > Import Mod from the menu bar. This will allow you to add a mod from a folder, which can be useful for importing mods from other profiles or sources.
Tip: You can also add mods by dragging and dropping them into the app. This will allow you to install multiple mods at a time.
After choosing a mod to add you will be shown either a FOMOD installer, or the default installation options.
Default mod installation
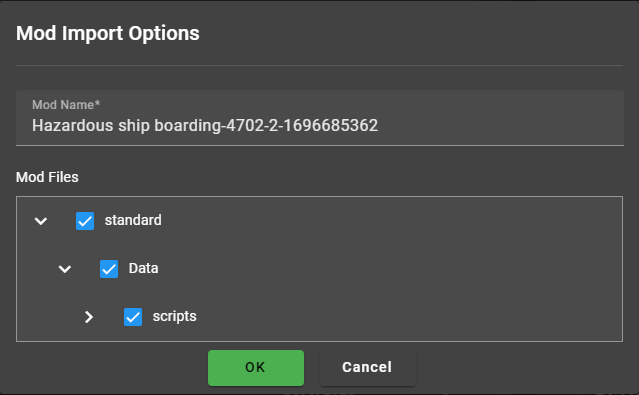
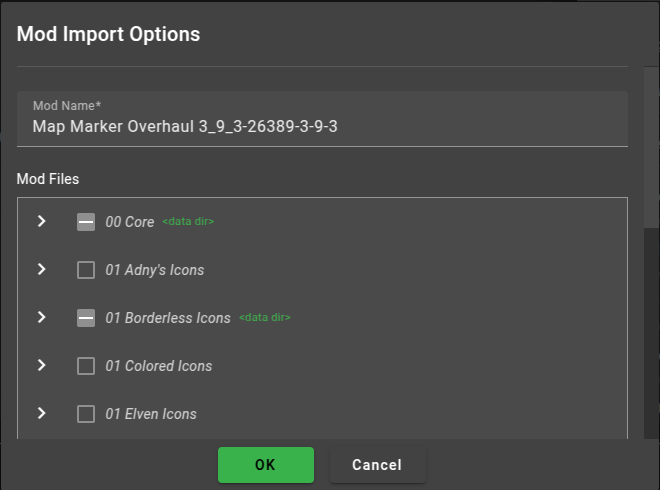
The default installation allows you to rename the mod and select which files from the mod to add. By default, all files from the mod will be added. However, some mods may occasionally contain a non-standard directory structure that can require changing the root data dir, like in the following example:
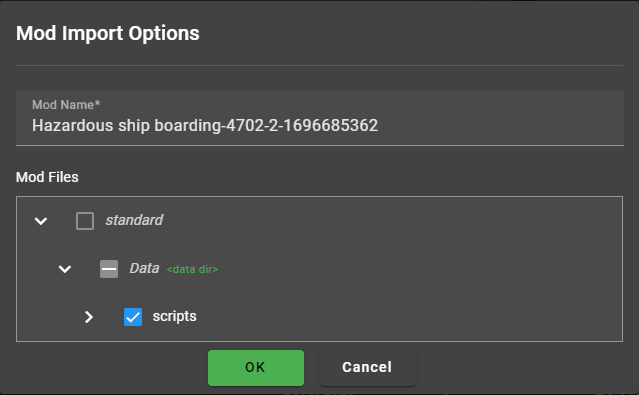
This mod contains a single root directory called standard that contains an inner Data directory with all of the mod files. We need to mark this inner Data directory as the root data dir in order for the mod to be installed correctly:
Now, only the files in standard/Data directory will be added for this mod.
Tip: Multiple directories can be marked as root data dir if needed.
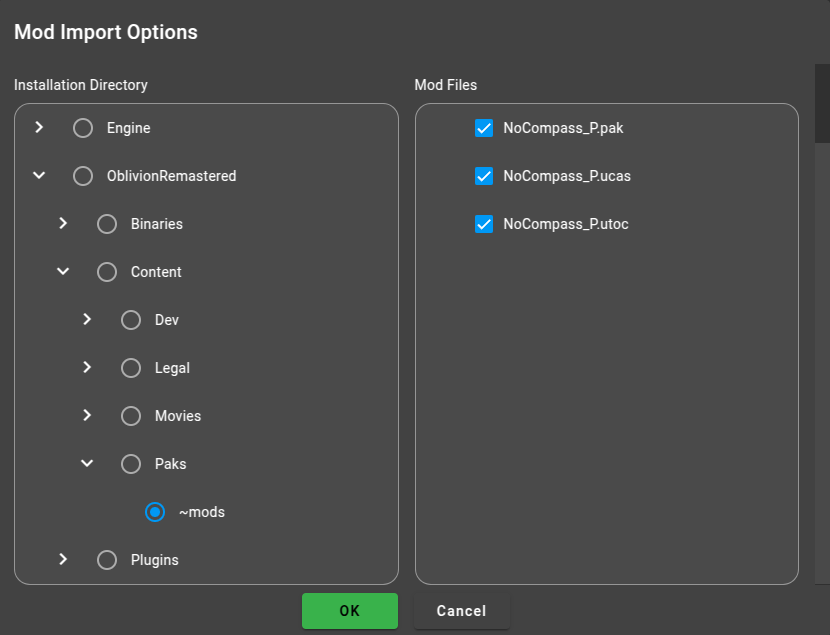
Some games will use multiple directories for mods. In this case, Stellar will attempt to figure out where to install mods if possible, but some mods may be packaged in a way where this is not possible. If Stellar cannot deduce the installation directory, you will need to choose which folder to install the mod to:
Select the installation directory on the left. If no folder is selected, mod will be installed to the top level data directory.
FOMOD installers
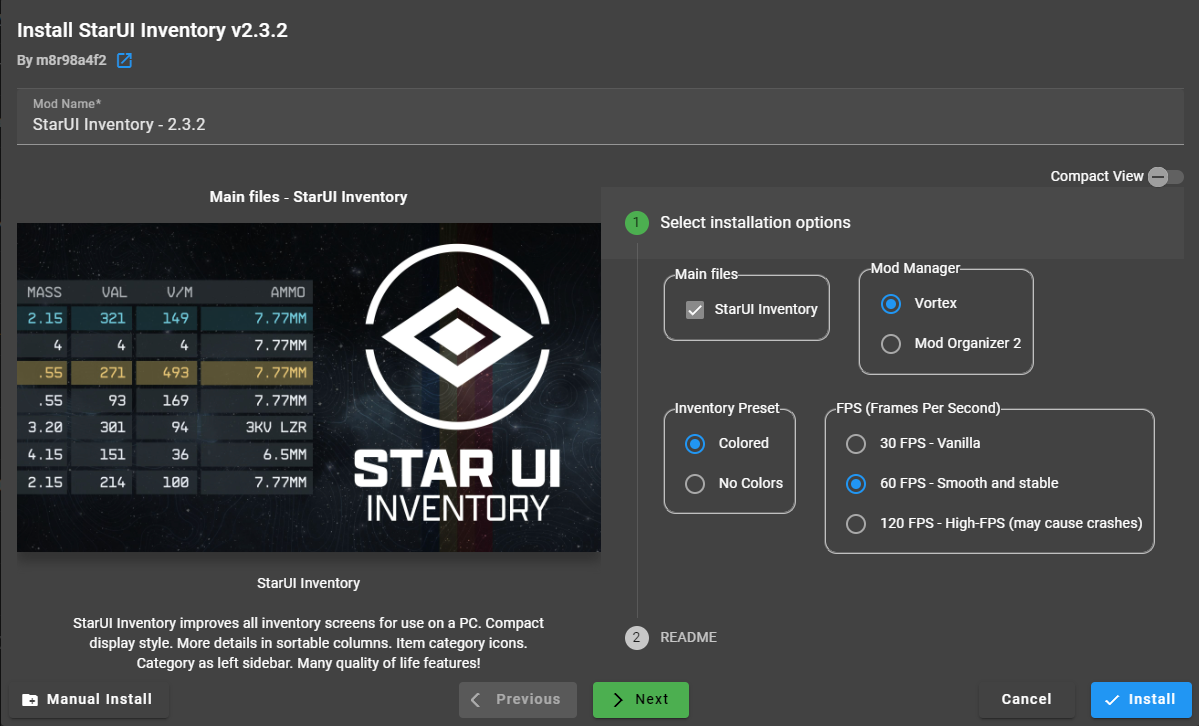
Some mods are packaged with special metadata known as FOMOD that allows for customizing the installation through a guided flow. Stellar supports FOMOD and will automatically show the installation wizard for FOMOD-compatible mods, as shown in the example below:
The installer will guide you through the installation of the mod. Hovering over or selecting an option will show information about what it does. If you wish to install the mod manually instead, you can click the Manual Install button at the bottom left corner of the installer window.
Note: Many mods will ask you if you are using Vortex or Mod Organizer 2. Stellar supports either option, but if you encounter any issues, select Mod Organizer 2.
Tip: Click the preview image (or the ? tooltip in compact view) to show a fullscreen view of the image.
BAIN installers
BAIN is another kind of packaging format for mods that allow for customizing installation. Mods that use BAIN will have directories that start with numbered prefixes (00, 10, 20, etc), representing features that can be optionally installed. To choose which features are installed, mark the features you want to install as root data dirs. Only these features will be installed.
Root mods
Root mods are mods that are deployed to the Game Base Directory instead of the Mod Base Directory. This allows for script extenders, DLSS injectors, ENBs, and other types of injectors to be managed as mods in your profile.
To add a root mod, click the + icon in the Mod List section and select Add Root Mod, or select Profile > Mods > Add Root Mod from the menu bar and chose the mod that you want to install.
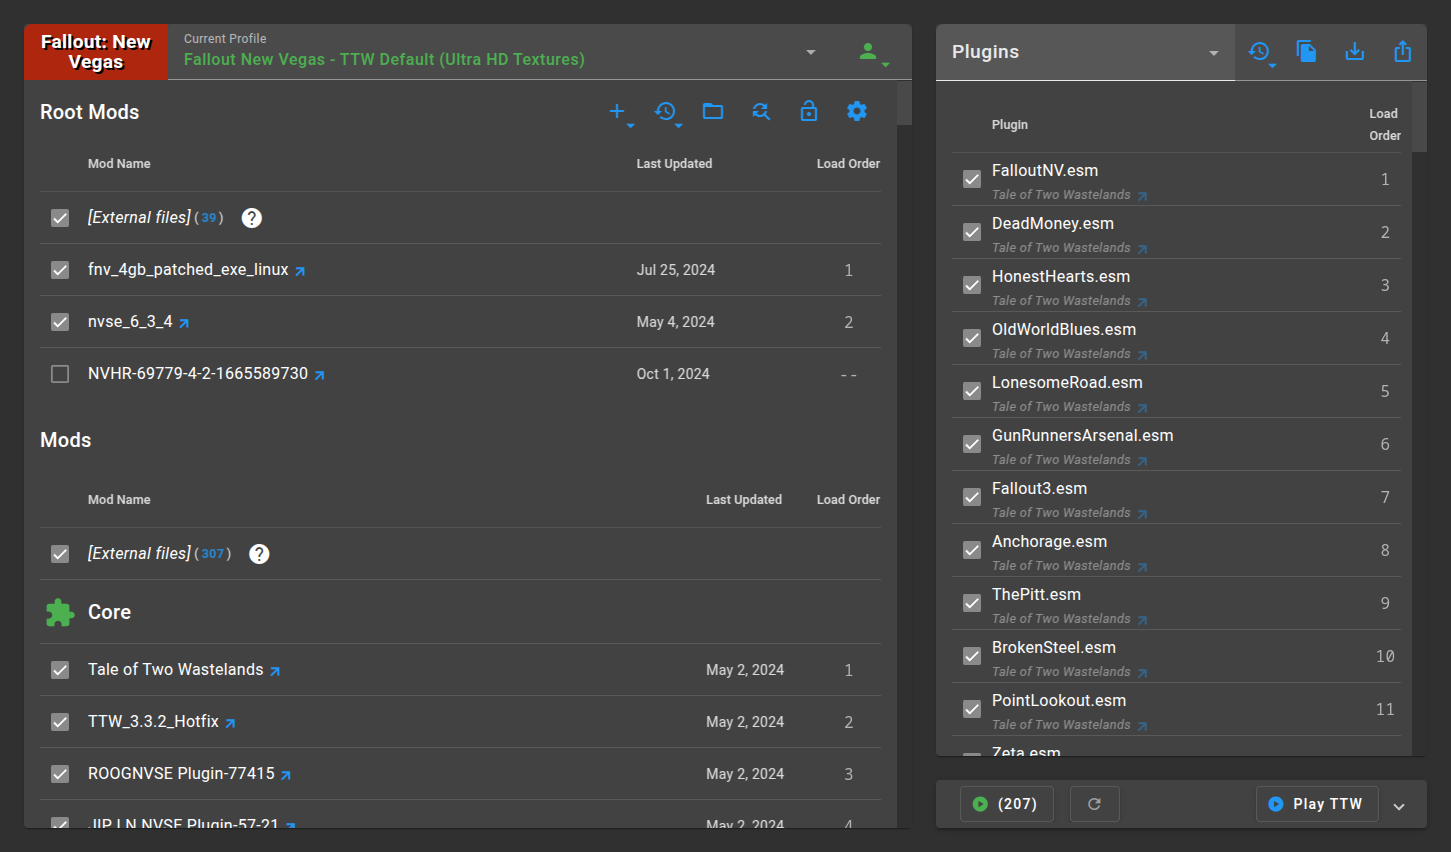
Managing your mods
Mods you have added will appear in your mods list with the load order of that mod shown to the right of its name. You can modify the load order of a mod by dragging and dropping it in the list. Unchecking a mod will disable it and make it inactive. Mods inherited from a base profile cannot be re-ordered or enabled/disabled.
You can right click individual mods to bring up additional options, such as renaming or deleting.
Tip: You can customize which columns of the mods list are visible under the View > Mod List Columns section of the app menu bar.
Mod section dividers
You can create section dividers in your mod list to better keep mods organized. To add a new section divider click the + icon and select Add Mod Section or Add Root Mod Section depending on which list you want to add a section to. You can customize the name and icon of each section divider.
You can rename or delete a section divider by right clicking the section and selecting the desired option. All mods in a section can also be enabled or disabled.
Mods can be easily moved between sections or to the top/bottom of a section by right clicking a mod and opening the Section sub-menu.
External files
Existing game files and other files that have been manually copied to the Mod Base Directory outside of your profile will show up in the UI as External files. When activating mods for a profile that overwrite external files, the original external files will be moved to a folder called .sml.bak while mods are activated. The files in the .sml.bak folder will be restored back to their original location upon deactivating mods.
Mod file overwrite
You can see which files are being overwritten by specific mods by enabling mod overwrite calculations. To enable mod overwrite calculations, click the file icon next to the Mod Name header in the mod list. Once enabled, file icons will be displayed next to mods that overwrite files from other mods. Clicking the file icon will show the list of files being overwritten by that mod.
Game plugins
Once at least one mod with a plugin has been installed, you will see your plugins listed along with their load order. Plugins can be individually disabled or re-ordered by dragging and dropping them. Plugins inherited from a base profile cannot be re-ordered or enabled/disabled.
You can right click individual plugins to bring up additional options.
Plugin type promotion
Most games have rules regarding the load order of different types of plugins. For Starfield and other Bethesda games, the order is ESM -> ESL -> ESP. However, mods sometimes contain ESP plugins that are “flagged” as ESM or ESL. While Stellar does not currently parse these flags, you can manually account for this by using plugin type promotion. To promote a plugin to a new type, right-click it and use the “Plugin Type” option to select the new plugin type. Once promoted, the plugin will behave as if it were of the promoted type.
External plugins
External game plugin management is optional for some games and is required for others. For games where external plugin management is optional, it can be enabled or disabled by pressing the “Manage External Plugins” button at the top left of the plugins list. When enabled, all external game plugin files will be shown in the list and can be re-ordered alongside profile-managed plugins.
Backup/restore plugin order
You can backup and restore the plugin load order using the buttons at the top right of the plugins list. Selecting the “Create Plugin Backup” option will allow you to create a new plugin order backup. Selecting the “Restore Plugin Backup” option will show a list of all available plugin order backups that can be restored. You can also export the plugin order in a plugins.txt-compatible format using the “Export Plugins List” button.
Note that any plugins in a backup that are not currently in the active plugin list will not be re-added.
Config file management
If you have enabled the Manage Config/INI Files option for your profile, you will be able to select the “Config” option from the dropdown at the top of the Plugins list. From this section you can edit your profile-specific config/INI files.
If profile-managed config/INI files are disabled, you will see an option in the “Actions” section to view external config files if any are found.
Backup/restore config files
You can backup and restore the current config file values using the buttons at the top right of the Config file management section. Selecting the “Create Config Backup” option will allow you to create a new config file backup. Selecting the “Restore Config Backup” option will show a list of all available config file backups that can be restored.
Save file management
If you have enabled the Manage Save Files option for your profile, you will be able to select the “Saves” option from the dropdown at the top of the Plugins list. From this section you can manage your profile-specific save files.
Activate your mods
To enable mods in the game you must first deploy the profile. Press the Activate Mods button in the Actions section to deploy the current profile.
Mods will now remain active until you press the Deactivate Mods button, even if you close the app or restart your PC.
IMPORTANT NOTE: If Link Mode is not enabled for the profile and you update any of the profile’s mod files externally (i.e. in a text editor) while mods are deployed, make sure to press the Refresh Files button after, otherwise your changes will not be applied.
Backup/restore mod order
You can backup and restore the mod load order using the “Backup” button at the top of the mod list. Selecting the “Create Mod Order Backup” option will allow you to create a new mod order backup. Selecting the “Restore Mod Order” option will show a list of all available mod order backups that can be restored.
Note that any mods in a backup that are not currently added to the profile will not be re-added.
Games
Game manager
To open the Game Manager, select File > Manage Games. You can browse the built-in game definitions here, as well as add, import, and export custom game definitions.
Custom games
If Stellar doesn’t have built-in support for a game you want to mod, you can create a custom game definition to add support for it. Existing custom game definitions can also be imported or exported, allowing you to share game definitions with others or submit them for inclusion directly into Stellar.
Import a custom game definition
To import an existing custom game definition, open the Game Manager and then click the gear icon and select “Import Game“. Browse for the custom game definition file and select it.
You can now create a new profile using this game definition.
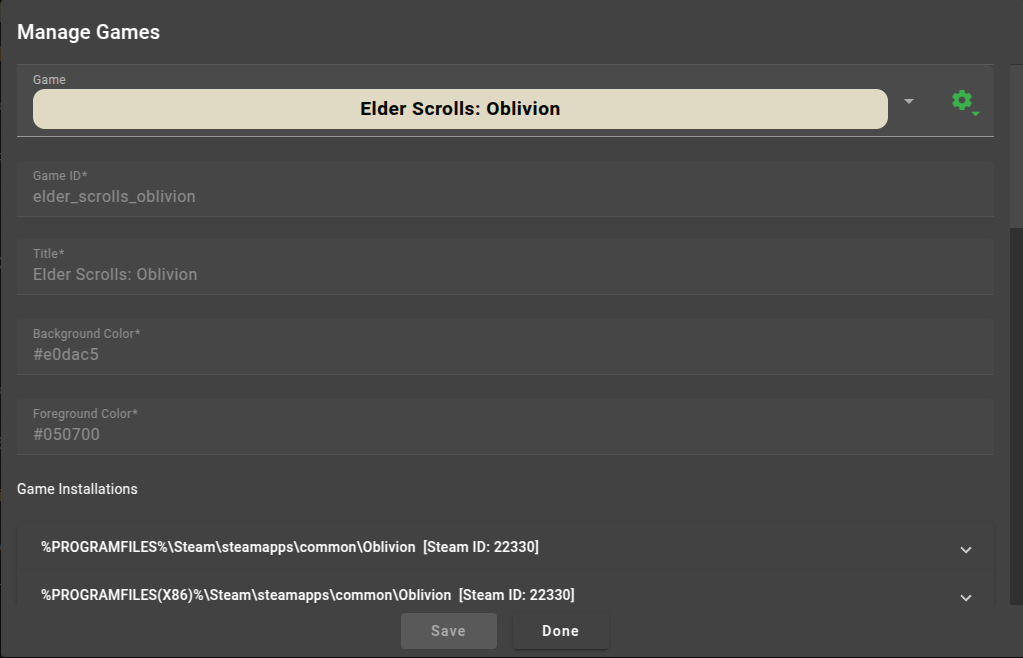
Create a custom game definition
To create a new custom game definition, open the Game Manager and then click the gear icon and select “Add New Game“. You will be presented with a form to define the details for the custom game:
Game ID
The ID for the game. This must be unique.
Title
The title of the game.
Background Color
The background color for the game. Can be either a hex color or rgb() definition.
Foreground Color
The foreground (text) color for the game. Can be either a hex color or rgb() definition.
Game Installations
The default game installation paths for this game. These are typically the default installation folders for the game on supported platforms.
Game Root Directory – The root installation directory for the game.
Game Data Directory – The directory where mod data for the game is installed. If this is the same as the Game Root Directory you can simply specify the same path (or “.”).
Game Config Files Directory – (Optional) The directory where config files for the game are located.
Game Saves Directory – (Optional) The directory where save files for the game are located.
Game Plugin List Path – (Optional) The location where the plugin list should be saved.
Steam IDs – (Optional) Any Steam game IDs associated with this installation (if applicable).
Multiple Mod Data Roots
Whether or not the game uses multiple subdirectories for mod data.
Game Binaries
(Optional) The names of binaries (i.e. the exe of the game). Also include the names of any possible mod loader binaries for the game here.
Save Formats
(Optional) The save file formats for the game.
Plugin Formats
(Optional) The plugin file formats for the game.
Require External Plugins
Whether or not external plugin file management is required for this game.
Plugin Data Directory
(Optional) The directory where plugin files are located, relative to the Game Data Directory.
Plugin List Type
(Optional) The type of plugin list for the game, if applicable.
Pinned Plugins
(Optional) Any plugin files that are required to be present for the game.
Game Config Files
(Optional) The names of the config files for the game.
Script Extenders
(Optional) Any script extenders for the game.
Name – The name of the script extender.
Binaries – The names of any binaries associated with the script extender.
Mod Paths – Any directories that are used by mods associated with this script extender.
For specific examples of these values you can also look at the definitions of the built-in games.
Once you have defined all of the details for the custom game, click the “Save” button to confirm your changes. The button will be disabled if there are any errors in your game definition.
You can now create a new profile using this game definition.
Export a custom game definition
If you would like to share your existing custom game definition, open the Game Manager and then click the gear icon and select “Export Game“. Select a file to save your game definition to. The game definition file can be shared and imported by others. You can also submit your game definition file for inclusion directly into Stellar.
Submit a custom game definition for inclusion into Stellar
Once you have tested your game definition to make sure everything works as expected, feel free to open an issue and submit your exported game definition file for inclusion directly into Stellar. If approved, your game definition will be added as a built-in game in a future release.
App settings
App settings can be changed via File > Preferences from the menu bar. The following settings are available:
Normalize mod file path
Some mods may use different casing for their files/folders (i.e. Interface vs interface) and this can cause issues on case-sensitive file systems, which are often used on Linux. When this setting is enabled, Stellar will automatically convert all activated mod files and folders to the correct case to avoid this issue.
It is recommended to enable the Normalize mod file path setting when using Linux with a case-sensitive file system.
Verify active profile on app startup
Whether or not the active profile should be verified upon starting Stellar. This is recommended to be enabled, but can be disabled if verification takes too long.
Enable game plugins
Whether or not plugin management is enabled. Only disable this if you do not want plugins to be managed.
(Linux) Steam compat data root
The path to Steam’s compatdata directory. By default this is located at ~/.local/share/Steam/steamapps/compatdata, but if it is located at a different location you can define it here. See this section for more information.
App theme
The app theme to use.
Launch the game
You can either click the Start Game button or simply launch the game directly through Steam, Game Pass, etc. The game should launch with your mods enabled!
Custom actions
Additional actions can be added by clicking the dropdown arrow to the right of the Start Game button and clicking New Action. Set the Name for your action and the Action to perform. Action can be a program or script along with any needed options. You can now select this action by clicking the dropdown arrow.
Launch profile from CLI
You can activate and launch a profile directly from the CLI by using the --launch argument. For example, if you want to activate the profile named “My Profile” and launch the game, you can specify the following:
stellar-mod-loader.exe --launch "My Profile"
You can also optionally specify the game action to run:
stellar-mod-loader.exe --launch "My Profile" "Custom Action Name"
This will activate the given profile and invoke the given action (or the currently active action if one isn’t specified).
Troubleshooting
Common issues
Symlinks are not enabled
If you get a warning about symlinks not being enabled when creating or editing a profile, you need to enable symlink permissions.
To enable symlinks in Windows, you can either A) enable Windows Developer Mode by going the Windows “Settings” app, select “For developers”, and then enable “Developer Mode”, or B) run Stellar as administrator (not recommended). Once enabled, Stellar should now be able to use symlinks.
The app sits on the “Verifying Profile…” loading screen for a long time during startup
This can happen when very large profiles are activated. If profile verification is taking too long, you can disable verification on app startup via the menu bar under File > Preferences.
(Linux) Some mods are not loading/strange behavior when loading some mods
This can be fixed by enabling Normalize mod file path for the app. See this section for more information.
(Linux) Mods are not loading when using a script extender like SFSE
This can be fixed by enabling Manage Steam Compat Symlinks for the profile. See this section for more information.
(Starfield) My mods are not loading
First, make sure you have added the following lines to your StarfieldCustom.ini file:
If mods still are not working, you may also need to also add these lines to your StarfieldPrefs.ini file.
If you are using the game’s installation Data folder as your Mod Base Directory, make sure you delete the Data folder at Documents/My Games/Starfield, otherwise your mods will not be detected by the game. The game will automatically create this folder on game start and when you take in-game screenshots. To change this behavior, you can add the following lines to your StarfieldCustom.ini and StarfieldPrefs.ini files to disable MotD and change your screenshots folder:
[General]bEnableMessageOfTheDay=0
[Display]sPhotoModeFolder=Photos
Report an issue
If you run into a problem, please check the issues page to see if your question has been answered, or create a new issue if you have a new bug to report.
If you have a suggestion for a new feature or a new game to support, feel free to open an issue for your request.
Devs – Building and testing
To build and run the app for testing and development, ensure you have Node and NPM installed on your machine and run npm install and npm run start.
To build a release, run npm run app:build-release for the current platform or npm run app:build-release:all for all supported platforms.
Stellar is a mod manager for Windows and Linux that supports games including Fallout, Oblivion, Skyrim, and Starfield. Formerly known as Starfield Mod Loader.
Features
Add, re-order, rename, disable and remove your mods and plugins.
Multiple profiles enable quick switching between different games and mod loadouts.
Base profiles allows for easily syncing mods between different devices, or VR and non-VR versions of games.
Root mod support enables management of ENBs, script extenders, and other injectors.
Custom game support allows Stellar to work with many games.
Cross-platform: Native clients for Windows and Linux (including Steam Deck).
Per-profile management of config files, save files, and archive invalidation.
Support for FOMOD installers.
Support for Steam, UWP (Game Pass) and other versions of games.
Note: This guide refers specifically to Starfield in some places, but most of the information also applies to other games.
To enable mods in Starfield, add the following lines to the StarfieldCustom.ini file in your Documents/My Games/Starfield folder if not already present:
To add and manage mods you must first create a profile. Upon first launching the app you will be shown a form to create a new profile.
Select which game you want to create the profile for. Then give your profile a unique name.
Select a Game Installation that the profile will use to deploy to. Any detected game installations will be listed automatically. If no installations are detected, or you want to define your own, select the Custom Installation option and define the required paths.
The Game Root Directory is the game’s installation directory.
The Game Data Directory is the directory mod files are deployed to. This is usually the Data folder inside the Game Root Directory.
The Game Config Files Directory is the directory where the game’s config files are located. For Bethesda games, this is located at <User_Directory>/Documents/My Games/<GameName>.
The Game Saves Directory is the directory where the game’s save files are located. For Bethesda games, this is located at <User_Directory>/Documents/My Games/<GameName>/Saves.
The Game Plugin List Path is the location of the plugins.txt file for the game. For Bethesda games, this is located at <User_Directory>/AppData/Local/<GameName>/plugins.txt.
Steam ID is the Steam ID for the game. This is only applicable if you’re using a Steam version of the game. This is only required if you plan on enabling Steam Compat Symlinks for Linux.
Manage Config/INI files
If the Manage Config/INI Files option is enabled, new config files will be created for the profile. When enabled, you must also define the Game Config Files Directory.
Upon first enabling the option, you will be prompted to copy the existing config files from the Game Config Files Directory to the profile’s config files.
NOTE: When activating mods, the profile’s config files will be copied to the Game Config Files Directory. If any existing config files are in the Game Config Files Directory when mods are activated, they will be moved to a .sml.bak folder during activation. The files moved to .sml.bak will be restored back to their original location upon deactivating mods.
Manage save files
If the Manage Save Files option is enabled, any created save games while this profile is deployed will be tied only to that profile. When enabled, you must also define the Game Saves Directory.
Link mode
When Link Mode is enabled, file links to the mod files will be used instead of copying the files when activating mods. This is significantly faster and uses less disk space. This setting is recommended to be enabled when possible.
Link mode can also be separately enabled for config files and save files. To enable/disable link mode for config or save files, click the icon to the left of Game Config Files Directory or Game Saves Directory.
NOTE: Link mode can only be enabled if the profile is located on the same disk/partition as the game itself.
Archive invalidation
Certain games require a feature called Archive Invalidation to properly load mod files. If this setting is enabled, Stellar will automatically enable archive invalidation to ensure all mods are loaded properly.
NOTE: It is recommended to also enable the “Manage Config/INI Files” option. However if it is disabled, and existing config files can be located, archive invalidation can still be enabled.
Base profile
You can optionally pick a base profile to inherit from. By default only base profiles from the current game are shown, but you can select any base profile by checkng Show all profiles.
See this section for more information about base profiles.
Profile path overrides
You can choose to override any of the profile paths to point to other directories. Each profile path override will be explained below.
Profile Root Path
By default, profiles are stored in the profiles directory where the application is located. Overriding this path will allow you to store the profile at an alternative location. This can be useful if your game is installed on a different drive and you want to co-locate the profile to the same drive as the game to enable Link mode.
A profile with an overridden root path is called an external profile. Existing external profiles can also be added or imported by selecting Profiles -> Add External Profile or Profiles -> Import Profile.
Profile mods path
Overriding this path will allow you to store the profile’s mods at an alternative location.
Profile saves path
Overriding this path will allow you to store the profile’s save files at an alternative location. This is useful if you are syncing save files between multiple PCs or profiles.
Profile config path
Overriding this path will allow you to store the profile’s config files at an alternative location. This is useful if you are syncing config files between multiple PCs or profiles.
Profile backups path
Overriding this path will allow you to store the profile’s backup files at an alternative location.
(Linux) Steam Compat Symlinks
When running a script extender such as SFSE via Steam/Proton, Steam will automatically create a new virtual C drive for it that is different from the virtual C drive used for the game itself. This means that when you go to launch the script extender, your config/INI and save files will not be loaded, and instead new ones will be created on the new virtual C drive.
To avoid having two separate copies of these files, symlinks can be created on the virtual C drive for the script extender that point to the correct directory on the original game’s virtual C drive. This allows both virtual C drives to use the same directory for reading config and save files.
Stellar can automate this behavior by enabling Manage Steam Compat Symlinks for the profile.
You will first need to figure out the new virtual C drive directory for the script extender, which will normally be located in ~/.local/share/Steam/steamapps/compatdata. You will see a number of directories in here with numerical IDs. One of these directories corresponds to the game ID that Steam assigned to the script extender. To determine which game ID is the correct one, you can look at the folder’s “Date modified” timestamp to figure out which virtual drive directories were created recently. Assuming you added the script extender to Steam recently, the directory should have a Date modified field that matches when it was added to Steam.
Once you have found the custom game ID, enter it as the Custom Steam Game ID for the profile. The necessary symlinks will now be created automatically when the profile is deployed.
Profile locking
Profiles can be locked/unlocked by clicking the “Lock Profile” button at the top of the mod list. When a profile is locked you will not be able to change any settings or edit mods for that profile.
Creating additional profiles
You can create additional profiles at any time by pressing the Create Profile button above the Mod List section or by selecting Profile > Add New Profile from the the menu bar.
Add external profiles
External profiles can be added to SML from Profile > Add External Profile. An external profile will remain in the same directory it was added from, allowing for profiles to be used from any location.
Import profiles
Existing profiles can be imported into SML from Profile > Import Profile.
Export profiles
You can export a profile from Profile > Export Profile. Exported profiles will be removed from SML after successful export. A backup of the profile will be written to <OS temp dir>/SML before export.
Delete profiles
You can delete a profile from Profile > Delete Profile. This cannot be undone.
Tip: You can change the app theme at any time under File > Preferences.
Base profiles
Base profiles are a special kind of profile that can be extended by other profiles. Mods and plugins in a base profile are added and managed as normal, but cannot directly be deployed. Instead, other profiles can extend a base profile and will automatically inherit mods, plugins, and config files from the base profile.
This allows for defining a common set of mods that can be used and extended by other profiles. One way this can be useful is for easily deploying a common set of mods between multiple PCs while also allowing for adding mods or config settings that may only be used on certain machines, such as high-res texture packs or specific compatability patches only needed for some devices. This can also be used to sync mods between different versions of games, such as Skyrim SE and Skyrim VR.
Game directories are not defined for base profiles, allowing extending profiles to point to different game installation locations as needed.
Add some mods
Once your profile is set up you can begin adding and managing mods. To add a new mod, click the + icon in the Mod List section and select Add Mod, or select Profile > Mods > Add Mod from the menu bar and choose the mod that you want to install.
Note: You can also import existing mods by clicking the + icon in the Mod List section and select Import Mod, or select Profile > Mods > Import Mod from the menu bar. This will allow you to add a mod from a folder, which can be useful for importing mods from other profiles or sources.
Tip: You can also add mods by dragging and dropping them into the app. This will allow you to install multiple mods at a time.
After choosing a mod to add you will be shown either a FOMOD installer, or the default installation options.
Default mod installation
The default installation allows you to rename the mod and select which files from the mod to add. By default, all files from the mod will be added. However, some mods may occasionally contain a non-standard directory structure that can require changing the root data dir, like in the following example:
This mod contains a single root directory called standard that contains an inner Data directory with all of the mod files. We need to mark this inner Data directory as the root data dir in order for the mod to be installed correctly:
Now, only the files in standard/Data directory will be added for this mod.
Tip: Multiple directories can be marked as root data dir if needed.
Some games will use multiple directories for mods. In this case, Stellar will attempt to figure out where to install mods if possible, but some mods may be packaged in a way where this is not possible. If Stellar cannot deduce the installation directory, you will need to choose which folder to install the mod to:
Select the installation directory on the left. If no folder is selected, mod will be installed to the top level data directory.
FOMOD installers
Some mods are packaged with special metadata known as FOMOD that allows for customizing the installation through a guided flow. Stellar supports FOMOD and will automatically show the installation wizard for FOMOD-compatible mods, as shown in the example below:
The installer will guide you through the installation of the mod. Hovering over or selecting an option will show information about what it does. If you wish to install the mod manually instead, you can click the Manual Install button at the bottom left corner of the installer window.
Note: Many mods will ask you if you are using Vortex or Mod Organizer 2. Stellar supports either option, but if you encounter any issues, select Mod Organizer 2.
Tip: Click the preview image (or the ? tooltip in compact view) to show a fullscreen view of the image.
BAIN installers
BAIN is another kind of packaging format for mods that allow for customizing installation. Mods that use BAIN will have directories that start with numbered prefixes (00, 10, 20, etc), representing features that can be optionally installed. To choose which features are installed, mark the features you want to install as root data dirs. Only these features will be installed.
Root mods
Root mods are mods that are deployed to the Game Base Directory instead of the Mod Base Directory. This allows for script extenders, DLSS injectors, ENBs, and other types of injectors to be managed as mods in your profile.
To add a root mod, click the + icon in the Mod List section and select Add Root Mod, or select Profile > Mods > Add Root Mod from the menu bar and chose the mod that you want to install.
Managing your mods
Mods you have added will appear in your mods list with the load order of that mod shown to the right of its name. You can modify the load order of a mod by dragging and dropping it in the list. Unchecking a mod will disable it and make it inactive. Mods inherited from a base profile cannot be re-ordered or enabled/disabled.
You can right click individual mods to bring up additional options, such as renaming or deleting.
Tip: You can customize which columns of the mods list are visible under the View > Mod List Columns section of the app menu bar.
Mod section dividers
You can create section dividers in your mod list to better keep mods organized. To add a new section divider click the + icon and select Add Mod Section or Add Root Mod Section depending on which list you want to add a section to. You can customize the name and icon of each section divider.
You can rename or delete a section divider by right clicking the section and selecting the desired option. All mods in a section can also be enabled or disabled.
Mods can be easily moved between sections or to the top/bottom of a section by right clicking a mod and opening the Section sub-menu.
External files
Existing game files and other files that have been manually copied to the Mod Base Directory outside of your profile will show up in the UI as External files. When activating mods for a profile that overwrite external files, the original external files will be moved to a folder called .sml.bak while mods are activated. The files in the .sml.bak folder will be restored back to their original location upon deactivating mods.
Mod file overwrite
You can see which files are being overwritten by specific mods by enabling mod overwrite calculations. To enable mod overwrite calculations, click the file icon next to the Mod Name header in the mod list. Once enabled, file icons will be displayed next to mods that overwrite files from other mods. Clicking the file icon will show the list of files being overwritten by that mod.
Game plugins
Once at least one mod with a plugin has been installed, you will see your plugins listed along with their load order. Plugins can be individually disabled or re-ordered by dragging and dropping them. Plugins inherited from a base profile cannot be re-ordered or enabled/disabled.
You can right click individual plugins to bring up additional options.
Plugin type promotion
Most games have rules regarding the load order of different types of plugins. For Starfield and other Bethesda games, the order is ESM -> ESL -> ESP. However, mods sometimes contain ESP plugins that are “flagged” as ESM or ESL. While Stellar does not currently parse these flags, you can manually account for this by using plugin type promotion. To promote a plugin to a new type, right-click it and use the “Plugin Type” option to select the new plugin type. Once promoted, the plugin will behave as if it were of the promoted type.
External plugins
External game plugin management is optional for some games and is required for others. For games where external plugin management is optional, it can be enabled or disabled by pressing the “Manage External Plugins” button at the top left of the plugins list. When enabled, all external game plugin files will be shown in the list and can be re-ordered alongside profile-managed plugins.
Backup/restore plugin order
You can backup and restore the plugin load order using the buttons at the top right of the plugins list. Selecting the “Create Plugin Backup” option will allow you to create a new plugin order backup. Selecting the “Restore Plugin Backup” option will show a list of all available plugin order backups that can be restored. You can also export the plugin order in a plugins.txt-compatible format using the “Export Plugins List” button.
Note that any plugins in a backup that are not currently in the active plugin list will not be re-added.
Config file management
If you have enabled the Manage Config/INI Files option for your profile, you will be able to select the “Config” option from the dropdown at the top of the Plugins list. From this section you can edit your profile-specific config/INI files.
If profile-managed config/INI files are disabled, you will see an option in the “Actions” section to view external config files if any are found.
Backup/restore config files
You can backup and restore the current config file values using the buttons at the top right of the Config file management section. Selecting the “Create Config Backup” option will allow you to create a new config file backup. Selecting the “Restore Config Backup” option will show a list of all available config file backups that can be restored.
Save file management
If you have enabled the Manage Save Files option for your profile, you will be able to select the “Saves” option from the dropdown at the top of the Plugins list. From this section you can manage your profile-specific save files.
Activate your mods
To enable mods in the game you must first deploy the profile. Press the Activate Mods button in the Actions section to deploy the current profile.
Mods will now remain active until you press the Deactivate Mods button, even if you close the app or restart your PC.
IMPORTANT NOTE: If Link Mode is not enabled for the profile and you update any of the profile’s mod files externally (i.e. in a text editor) while mods are deployed, make sure to press the Refresh Files button after, otherwise your changes will not be applied.
Backup/restore mod order
You can backup and restore the mod load order using the “Backup” button at the top of the mod list. Selecting the “Create Mod Order Backup” option will allow you to create a new mod order backup. Selecting the “Restore Mod Order” option will show a list of all available mod order backups that can be restored.
Note that any mods in a backup that are not currently added to the profile will not be re-added.
Games
Game manager
To open the Game Manager, select File > Manage Games. You can browse the built-in game definitions here, as well as add, import, and export custom game definitions.
Custom games
If Stellar doesn’t have built-in support for a game you want to mod, you can create a custom game definition to add support for it. Existing custom game definitions can also be imported or exported, allowing you to share game definitions with others or submit them for inclusion directly into Stellar.
Import a custom game definition
To import an existing custom game definition, open the Game Manager and then click the gear icon and select “Import Game“. Browse for the custom game definition file and select it.
You can now create a new profile using this game definition.
Create a custom game definition
To create a new custom game definition, open the Game Manager and then click the gear icon and select “Add New Game“. You will be presented with a form to define the details for the custom game:
Game ID
The ID for the game. This must be unique.
Title
The title of the game.
Background Color
The background color for the game. Can be either a hex color or rgb() definition.
Foreground Color
The foreground (text) color for the game. Can be either a hex color or rgb() definition.
Game Installations
The default game installation paths for this game. These are typically the default installation folders for the game on supported platforms.
Game Root Directory – The root installation directory for the game.
Game Data Directory – The directory where mod data for the game is installed. If this is the same as the Game Root Directory you can simply specify the same path (or “.”).
Game Config Files Directory – (Optional) The directory where config files for the game are located.
Game Saves Directory – (Optional) The directory where save files for the game are located.
Game Plugin List Path – (Optional) The location where the plugin list should be saved.
Steam IDs – (Optional) Any Steam game IDs associated with this installation (if applicable).
Multiple Mod Data Roots
Whether or not the game uses multiple subdirectories for mod data.
Game Binaries
(Optional) The names of binaries (i.e. the exe of the game). Also include the names of any possible mod loader binaries for the game here.
Save Formats
(Optional) The save file formats for the game.
Plugin Formats
(Optional) The plugin file formats for the game.
Require External Plugins
Whether or not external plugin file management is required for this game.
Plugin Data Directory
(Optional) The directory where plugin files are located, relative to the Game Data Directory.
Plugin List Type
(Optional) The type of plugin list for the game, if applicable.
Pinned Plugins
(Optional) Any plugin files that are required to be present for the game.
Game Config Files
(Optional) The names of the config files for the game.
Script Extenders
(Optional) Any script extenders for the game.
Name – The name of the script extender.
Binaries – The names of any binaries associated with the script extender.
Mod Paths – Any directories that are used by mods associated with this script extender.
For specific examples of these values you can also look at the definitions of the built-in games.
Once you have defined all of the details for the custom game, click the “Save” button to confirm your changes. The button will be disabled if there are any errors in your game definition.
You can now create a new profile using this game definition.
Export a custom game definition
If you would like to share your existing custom game definition, open the Game Manager and then click the gear icon and select “Export Game“. Select a file to save your game definition to. The game definition file can be shared and imported by others. You can also submit your game definition file for inclusion directly into Stellar.
Submit a custom game definition for inclusion into Stellar
Once you have tested your game definition to make sure everything works as expected, feel free to open an issue and submit your exported game definition file for inclusion directly into Stellar. If approved, your game definition will be added as a built-in game in a future release.
App settings
App settings can be changed via File > Preferences from the menu bar. The following settings are available:
Normalize mod file path
Some mods may use different casing for their files/folders (i.e. Interface vs interface) and this can cause issues on case-sensitive file systems, which are often used on Linux. When this setting is enabled, Stellar will automatically convert all activated mod files and folders to the correct case to avoid this issue.
It is recommended to enable the Normalize mod file path setting when using Linux with a case-sensitive file system.
Verify active profile on app startup
Whether or not the active profile should be verified upon starting Stellar. This is recommended to be enabled, but can be disabled if verification takes too long.
Enable game plugins
Whether or not plugin management is enabled. Only disable this if you do not want plugins to be managed.
(Linux) Steam compat data root
The path to Steam’s compatdata directory. By default this is located at ~/.local/share/Steam/steamapps/compatdata, but if it is located at a different location you can define it here. See this section for more information.
App theme
The app theme to use.
Launch the game
You can either click the Start Game button or simply launch the game directly through Steam, Game Pass, etc. The game should launch with your mods enabled!
Custom actions
Additional actions can be added by clicking the dropdown arrow to the right of the Start Game button and clicking New Action. Set the Name for your action and the Action to perform. Action can be a program or script along with any needed options. You can now select this action by clicking the dropdown arrow.
Launch profile from CLI
You can activate and launch a profile directly from the CLI by using the --launch argument. For example, if you want to activate the profile named “My Profile” and launch the game, you can specify the following:
stellar-mod-loader.exe --launch "My Profile"
You can also optionally specify the game action to run:
stellar-mod-loader.exe --launch "My Profile" "Custom Action Name"
This will activate the given profile and invoke the given action (or the currently active action if one isn’t specified).
Troubleshooting
Common issues
Symlinks are not enabled
If you get a warning about symlinks not being enabled when creating or editing a profile, you need to enable symlink permissions.
To enable symlinks in Windows, you can either A) enable Windows Developer Mode by going the Windows “Settings” app, select “For developers”, and then enable “Developer Mode”, or B) run Stellar as administrator (not recommended). Once enabled, Stellar should now be able to use symlinks.
The app sits on the “Verifying Profile…” loading screen for a long time during startup
This can happen when very large profiles are activated. If profile verification is taking too long, you can disable verification on app startup via the menu bar under File > Preferences.
(Linux) Some mods are not loading/strange behavior when loading some mods
This can be fixed by enabling Normalize mod file path for the app. See this section for more information.
(Linux) Mods are not loading when using a script extender like SFSE
This can be fixed by enabling Manage Steam Compat Symlinks for the profile. See this section for more information.
(Starfield) My mods are not loading
First, make sure you have added the following lines to your StarfieldCustom.ini file:
If mods still are not working, you may also need to also add these lines to your StarfieldPrefs.ini file.
If you are using the game’s installation Data folder as your Mod Base Directory, make sure you delete the Data folder at Documents/My Games/Starfield, otherwise your mods will not be detected by the game. The game will automatically create this folder on game start and when you take in-game screenshots. To change this behavior, you can add the following lines to your StarfieldCustom.ini and StarfieldPrefs.ini files to disable MotD and change your screenshots folder:
[General]bEnableMessageOfTheDay=0
[Display]sPhotoModeFolder=Photos
Report an issue
If you run into a problem, please check the issues page to see if your question has been answered, or create a new issue if you have a new bug to report.
If you have a suggestion for a new feature or a new game to support, feel free to open an issue for your request.
Devs – Building and testing
To build and run the app for testing and development, ensure you have Node and NPM installed on your machine and run npm install and npm run start.
To build a release, run npm run app:build-release for the current platform or npm run app:build-release:all for all supported platforms.


 https://github.com/mahajanankur/motifer